 made in the USA

Customer Success Highlight: Tom B.
Tom's brother-in-law purchased a lake house in New Hampshire to serve as a family vacation home. Here, the family gathers for golf trips, lake weekends, and to spend quality time together. While the location leaves nothing to be desired, the house itself was in need of a bit of a facelift. One area that was of particular concern was the kitchen.
After the final bell rings, Tom steps away from the classroom, grabs his tool belt, and heads to the job site. Tom is a skilled DIYer with experience in a few areas. For example, Tom built a new deck at the lake house.

For the next improvement project, Tom moved indoors. The kitchen in the lake house had older cabinets that gave the space a bit of an outdated look and feel. Before Tom got his hands on the project, they got a quote from an architect and a designer for the project. While working with professionals is typically the quickest and easiest way to achieve stunning results, it does come with a larger price tag.
After considering their options, Tom convinced his brother-in-law let him do the project himself. In this Custom Success Highlight, we are going to take a look at how Tom single-handedly took on this kitchen refacing project.
Getting Started
Tom told me that the cabinet boxes at the lake house were still in good condition. This meant that rather than having to do a full remodel and gut the cabinets, he was able to reface them instead. Refacing your cabinets is the process of replacing just the cabinet doors and drawer fronts. You will also refinish the cabinet boxes, which means that you will be repainting them or covering them with a veneer or laminate material.
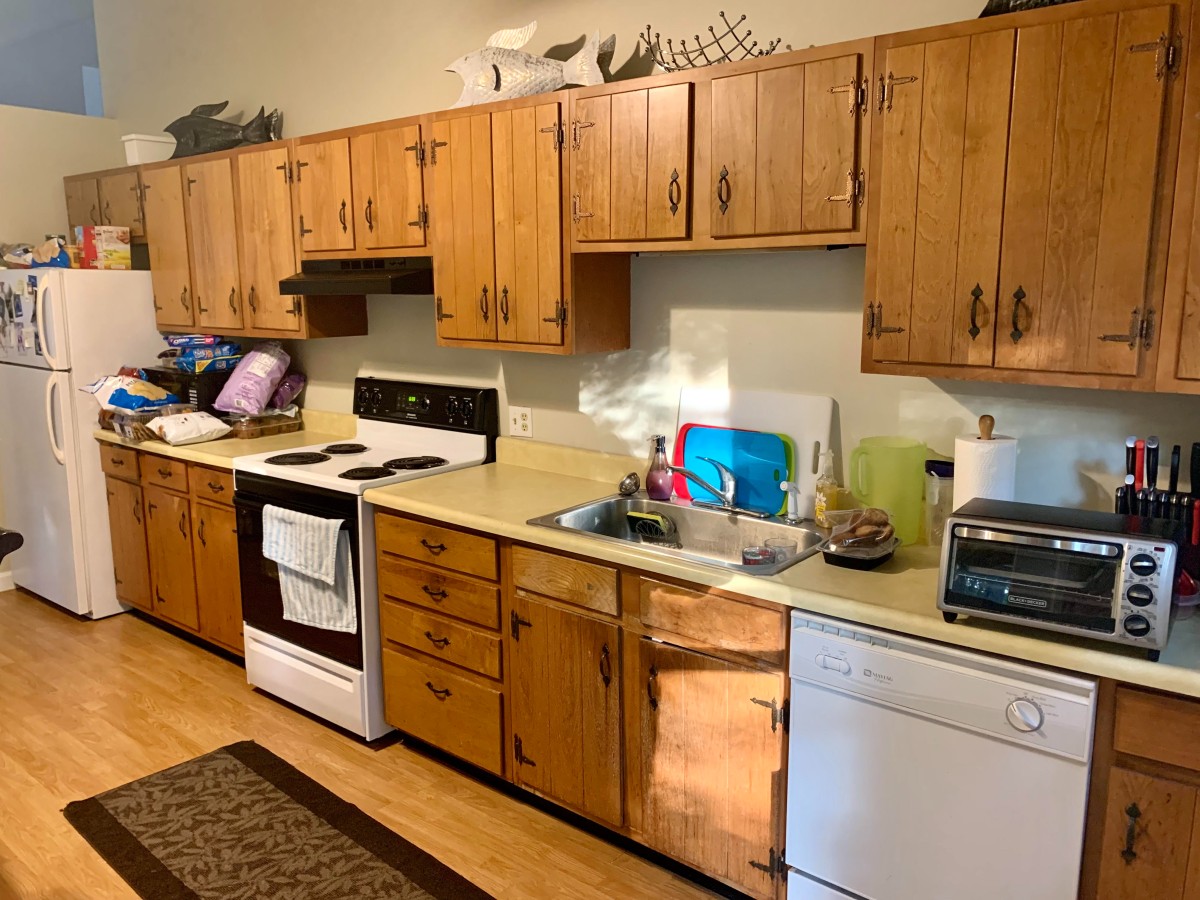
The old cabinets
The first step in any refacing project is to size your new cabinet doors and drawer fronts. If you like the overlay or the distance the fronts go past the cabinet box opening, then you can order your new cabinet fronts to be the same size as the existing ones. This was Tom’s plan, so he measured each door and drawer front. At CabinetNow, we are able to make our products to 1/16 of an inch, so you can be as exact as possible.
Once all the measurements are double-checked and ready, it is time to pick out a style!
Cabinet Door and Drawer Front Styles
Selecting a new style for your kitchen cabinets can feel like a daunting task. With so many options currently available, it can be difficult to know where to even begin looking. Social media can be a great place to start looking for inspiration and to get an idea of what you might be interested in. Alternatively, you can begin browsing by removing results that you know you don’t like.
For example, if you are not interested in arched cabinet doors, then you can just search through our square panel cabinet doors. If you know that you want a square shape and a flat panel, our website can filter the results so you only see what you are looking for!
Tom and his brother-in-law browsed around and landed on the Shaker Modern Thermofoil cabinet door. The Modern Thermofoil series features our trendiest thermofoil cabinet door styles in a huge variety of the latest colors and textures. This collection boasts modern designs in stunning colors from sage green to brushed aluminum. For Tom and his brother-in-law, the choice was our Fashion Grey.
The Shaker Style

The new Shaker Modern doors in Fashion Grey
Shaker-style cabinet doors can be great if you are going for modern or transitional designs. The original Shaker design has been around for well over a century and remains highly popular. Shaker cabinet doors feature no detail on either the inside or the outside edge, which works to create clean, crisp lines in your space.
The doors in the Modern Thermofoil series take this original Shaker design as inspiration. These styles reinterpret the shaker for a modern audience in modern colors and textures. The Modern Shaker thermofoil door introduces the slightest detail to the inside and outside edge, but it is so subtle that it may be missed by a casual observer.
Once the new cabinet doors and drawer fronts arrived, it was time to get started.
Cabinet Door Installation
The first step in the project can actually happen before your new fronts arrive on site. As your delivery date approaches, you can begin removing the old cabinet doors and drawer fronts. This process is relatively easy; however, you should be sure to take your time as your remove each piece. Cabinet refacing only works so long as the cabinet box remains structurally sound. The last thing you want to do is to carelessly damage the boxes while removing the doors.
As you take each door off its hinges, or drawer off its slides, be sure to label all the hardware you plan to reuse. Often, you can reuse your hinges and other hardware pieces during a refacing, which is a great way to save some money. However, if you are unable to remember where or how to reattach a piece, then you may be in trouble.
You will also want to remove anything from inside the cabinet boxes that could become damaged or coated in dust. You may also want to put down plastic or drop clothes if you are refinishing your cabinet boxes.

Freshly Painted Cabinet Frame
In order to match the new cabinet fronts, Tom gave the cabinet boxes a new coat of paint. Once Tom received the new doors, he took a sample down to the paint store and got a color match. This way, the new paint for the boxes will be as close as possible to the new doors.
Installation Tip
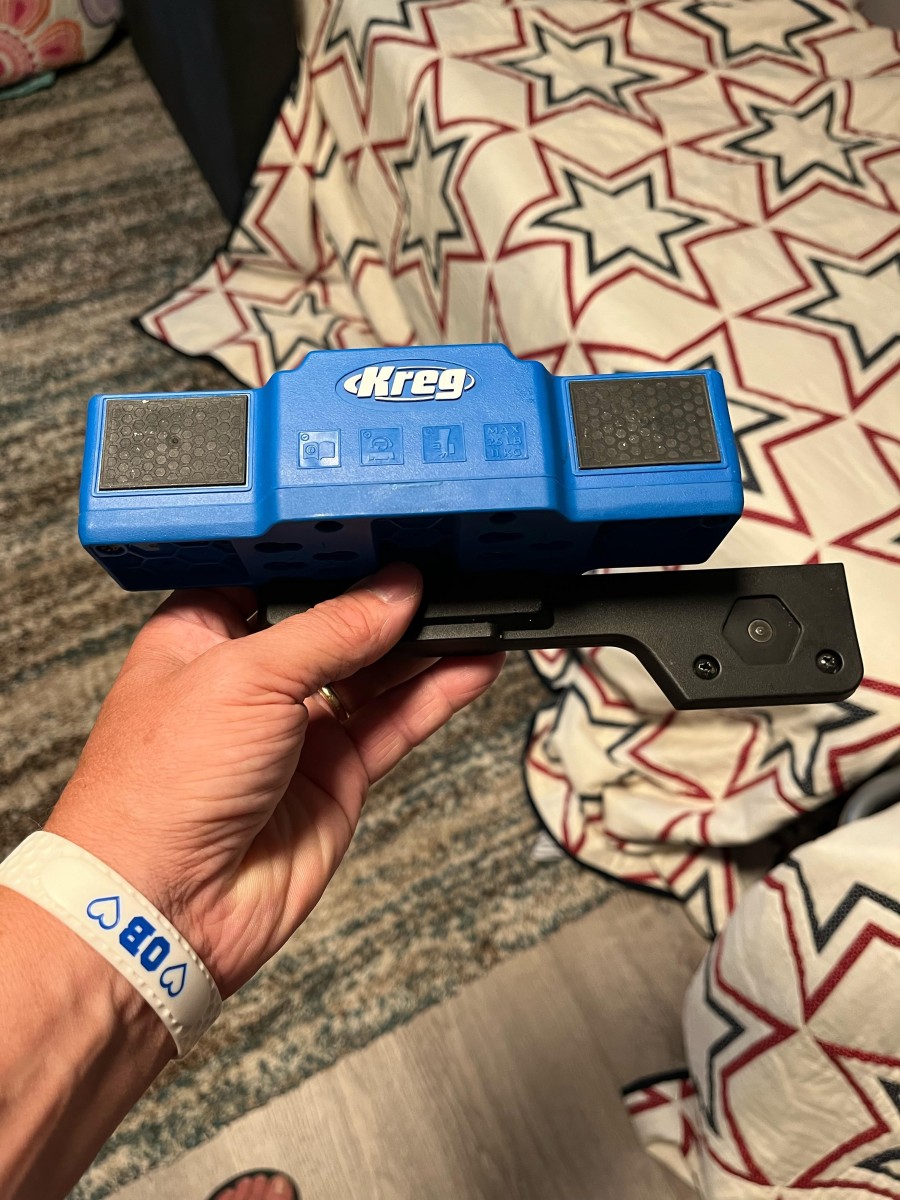
The Kreg Tool Tom Used
As mentioned above, Tom accomplished this cabinet refacing project without any assistance. However, Tom did have a bit of help with a handy cabinet door mounting jig from Kreg Tools. While I have never used this particular jig, Tom told me that it made the mounting process very smooth. It is easily adjustable for both right and left side mounting, and it holds the doors up so that you have a free hand to secure the door to the frame. With the help of this tool, Tom was able to get his doors mounted plumb and level.
Finishing Touches Make the Difference
Once the paint dried and Tom finished mourning the fronts, it was time to add some finishing touches. One part of the project that happened a bit off stage from our view was the installation of a new refrigerator. Since this vacation house is primarily used for hosting groups, it only made sense to upgrade the fridge to a larger, more modern model.
To create a bit more unity in the design, Tom painted the oven hood and front panel on the dishwasher black to better match the new refrigerator. When I first saw the pictures of the work, I would have never known this cool fact if Tom had not clued me in.

The kitchen with the hardware on and appliances painted
In addition, Tom also installed sleek, black handles. These were an excellent choice to pair with both the shaker style and the new refrigerator. On the one hand, they match the color of the refrigerator and newly painted dishwasher and oven. But, on the other hand, choosing handles over knobs introduces more vertical and horizontal lines in the design, which mirror the classic shaker design. These extra details and smart design choices help to tie everything together and to keep the eye engaged.
Finishing Up… For Now
And just like that, the dated, wood-tone kitchen has been given a modern facelift. However, Tom told me that he isn’t done with the kitchen yet. He also let me know that he would give us all an update when the next stage of his plan is finished, so we are excitedly waiting to what is next!
If you are ready to start ordering or if you need assistance, please feel free to call us at 1-855-669-5222 or send us an email at info@cabinetnow.com. Our team of cabinet experts is here to help with everything from measuring to ordering.

Lots of vertical lines add height

