 made in the USA

Spray-Painting CabinetNow Doors: Sandra's DIY Success
In the world of DIY enthusiasts, Sandra, affectionately known as Saw Dust Girl, had embarked on an exciting journey. She was there to share her experience of painting and installing CabinetNow Shaker cabinet doors in her Jack and Jill bathroom. As she brought her vision to life, Sandra also took the time to address some of the frequently asked questions about her painting techniques and trusty airless sprayer. This post was a heartfelt ode to CabinetNow.com, the company that generously provided her with the doors, and a testament to the support she valued so much.
Measuring for Inset Doors
Before Sandra's first visit and any unforeseen plumbing challenges, meticulous measurements were in order. With a grand total of 39 cabinets spread across bedroom closets and the bathroom, precision was key. Sandra had opted for the intricacies of inset doors, demanding a level of accuracy that exceeded overlay doors. When measuring for inset doors, she had taken the entire cabinet opening into account, measuring top to bottom for width and right to left for height. Any variations in measurements were resolved by using the smallest one, emphasizing that even a 1/16" discrepancy could make a difference.
Sandra had diligently emailed all her measurements to CabinetNow.com, who had promptly initiated the process of crafting her custom doors. CabinetNow had offered a plethora of door styles and wood selections, and Sandra had chosen simple Shaker doors with Maple frames and MDF panels, an excellent choice for painting. The doors had arrived at her doorstep with meticulous packaging, finish sanded, and ready for her artistic touch.
Air and Light
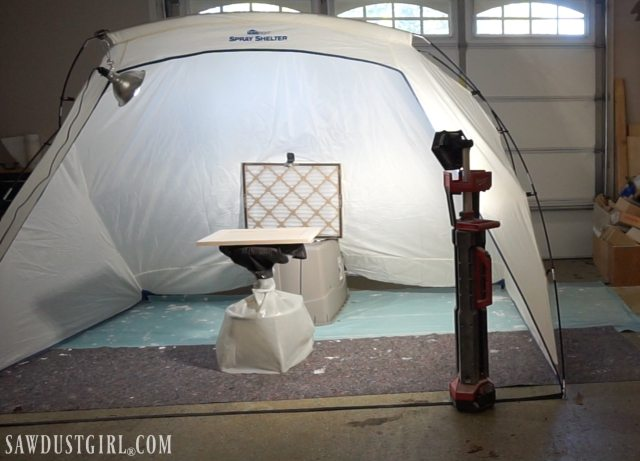
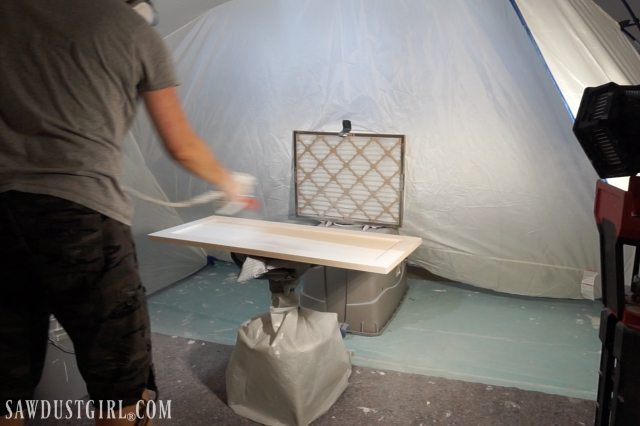
Sandra's painting adventure had commenced in Wes' garage, where she had set up her modified HomeRight spray booth. Airflow had been critical when using an airless sprayer, as it had ensured the overspray was pulled away from the project. Sandra had pointed out that this was essential for any type of paint spraying, whether airless, HVLP, or canned spray paint, as overspray particles could settle on the project surface, leading to a rough and uneven finish.
To maintain optimal airflow, Sandra had employed a box fan within her spray booth, fitted with an inexpensive air filter to capture overspray and prevent paint from reaching the garage floor. Adequate lighting had been equally essential to achieve a flawless paint finish, as it had allowed for precise observation of the project surface.
Prep the Airless Sprayer and Paint
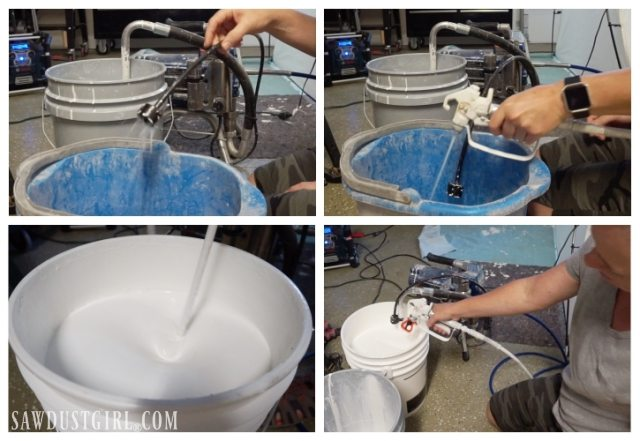
Sandra had been using her Graco Nova 390 airless sprayer for several years with exceptional results, though it had required thorough preparation and cleanup. She had stored the sprayer with Pump Armour, necessitating cleaning before each use. The process had involved flushing soapy water through the suction hose, clean water, and thorough mixing of primer. Primer had been then pulled through the suction hose and spray hose to ensure it was ready for application. Once all preparations had been complete, Sandra had affixed the tip guard with the appropriate tip onto the gun.
Sandra had opted for leftover KILZ primer, which she had found to work well and level out nicely. She had explained the complexities of airless sprayer tips, where the first number on the tip indicated the spray pattern's size, and the second number had been multiplied by 2 to determine the actual width. This knowledge had been crucial in selecting the right tip for her project. While she had ideally needed a 317-321 tip, she had settled for a 315, which had required high pressure to achieve satisfactory results. Despite some overspray and primer wastage, Sandra had emphasized that primer was less expensive than paint and had expressed her preference for wearing a respirator in addition to using her fan-equipped filter to keep the workspace safe.
Spraying and Drying
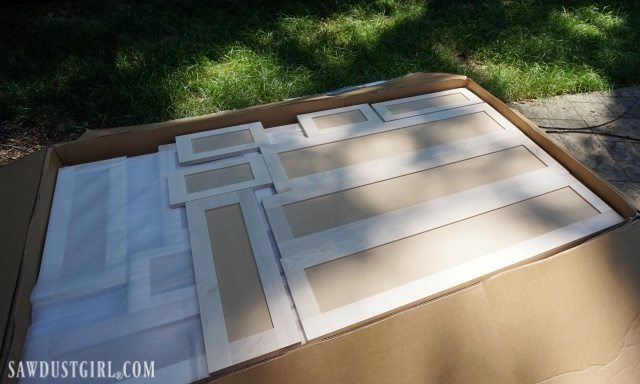
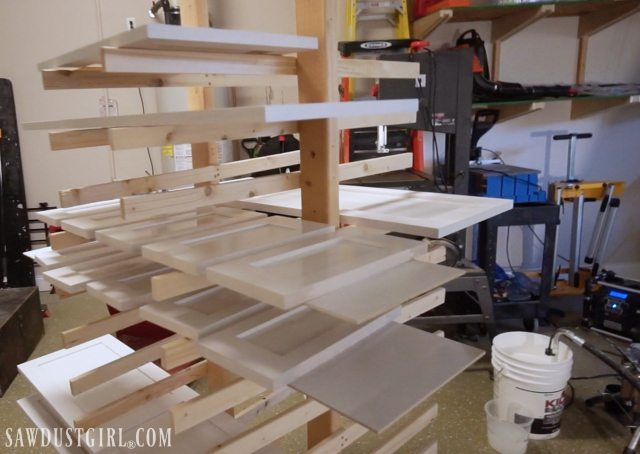
Sandra's project had included painting both cabinet doors and drawer fronts, most of which had been small enough for her to paint four or five at a time on a scrap board. However, she had humorously noted the emergence of painty footprints on Wes' garage floor due to a shortage of drop cloths and the feeling of a cramped workspace. Fortunately, she had had the luxury of two consecutive beautiful days, prompting her to move her work station outside.
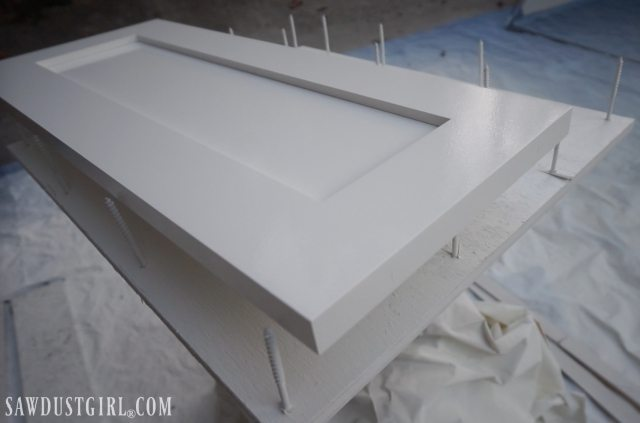
Several adjustments had been made to enhance her "work station," including positioning a box fan inside the garage to direct air away from the project and creating a better spray stand using a scrap piece of wood with strategically hammered screws. Despite her efforts, a paint mishap had left the stand uncovered at times, but Sandra had taken it in stride.
Painting with an Airless Sprayer
After priming both sides of her cabinet doors, Sandra had transitioned to painting. She had shared her choice of paint, Sherwin Williams Pro Classic Semi Gloss in Decorator White, and her preference for fine finish tips used with the BLUE tip guard. Sandra had also recommended that when painting horizontal surfaces, it was acceptable to apply a slightly heavier coat than on vertical surfaces to prevent drips or sags.
Using an airless sprayer, she had stressed the importance of maintaining a perpendicular angle between the spray gun and the project surface, avoiding tilting the wrist. Sandra had likened the spray gun to an extension of the arm, moving it back and forth with the paint flow beginning before contact with the project and ending after moving beyond it. She had carefully demonstrated her approach, emphasizing that achieving the right amount of paint on the surface resulted in a beautiful glass-like finish with a single coat. For thinner coats, a second coat could be applied after the first had dried.
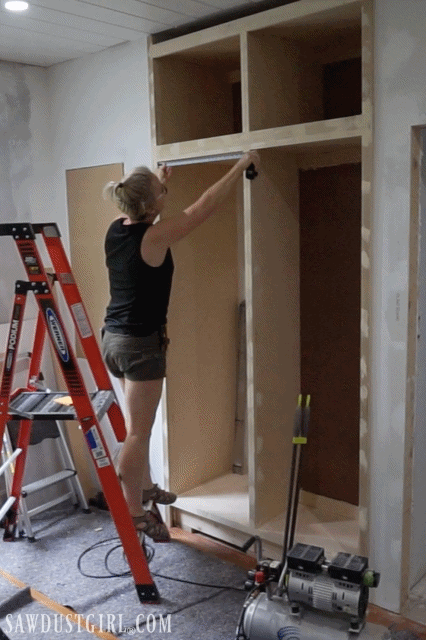
Sandra had acknowledged that when dealing with a smaller number of doors, brushing and rolling could be more practical than setting up the airless sprayer. Painting all 39 doors had taken three days in total, factoring in drying times between each coat. Now, she had been gearing up for the installation phase, which had included boring for the hinges—an undertaking she had wished she'd opted for CabinetNow's professional service for, given the challenges she had encountered with the hinge jig. Sandra had eagerly anticipated the arrival of a $300 jig that she had hoped would simplify the installation process and make all her cabinetry dreams come true.
Final Result!
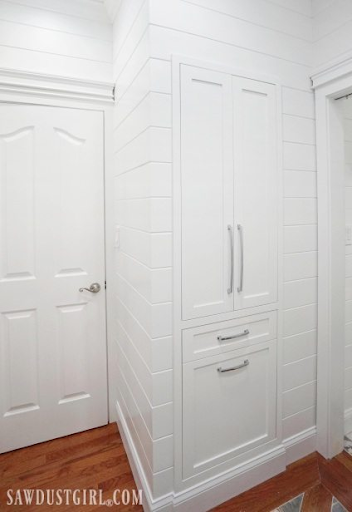
The final color blended smoothly with the rest of her bathroom using her seamless airless sprayer technique. If you are ready to start your DIY cabinetry journey, don't hesitate to contact us at 1-855-669-5222 or email at info@cabinetnow.com. We are eager to share stories like Sandra's!

