 made in the USA

5 Tips for Installing DIY Cabinet Doors
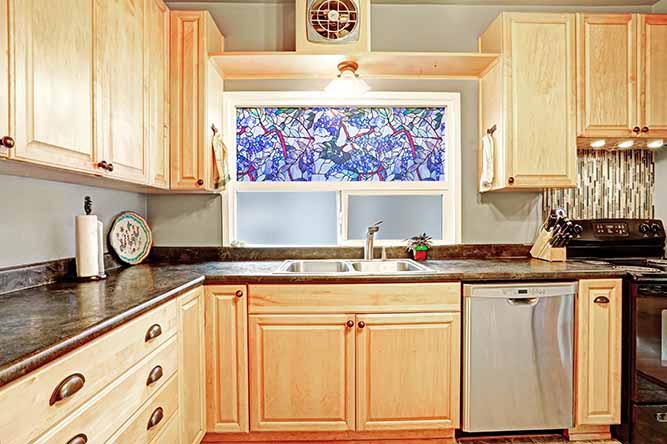
Refacing your kitchen cabinets can update your kitchen for a fraction of the cost of remodeling. It's a great choice when you are ready for a new style but don't want to make over the entire flow of the room. There are many different styles of DIY cabinet doors available that you can customize to fit your needs.
Tips for Installing DIY Cabinet Doors
With any construction project, the first and most important tip is always the same: Measure twice and cut once. When it comes to refacing cabinets, you won't have to do any literal cutting, but the meaning of this old saying remains. Take your time and prepare thoroughly, and you will spare yourself a lot of trouble.
1. Remove Old Doors Carefully

Be mindful and patient as you remove the old cabinet doors. You don't want to damage the frames or the boxes behind them.
Support the cabinet door while removing the hinges so it doesn't fall or move enough to pull the screws out. You can damage the frame if the door drops or shifts position before you finish removing all of the screws. Remember, you'll be hanging your new doors on that frame; take your time and preserve the integrity of the cabinet boxes.
Remove screws in the bottom of each hinge first, working your way up to the top. The top screw will hold the door in place while you work on loosening the lower ones as long as you support the weight of the door.
Keep the screws and hinges together if you plan to reuse the hardware. Set the screws into the corresponding holes in each hinge and run a piece of masking tape across the hinge over the screw heads to hold them in place. Label each hinge or tape them to the doors in the proper position.
Hinges and screws change shape over time. If you are going to put back the used ones, you'll have an easier time if you return each piece to its original location.
2. Measure Properly for Replacements
Trying to hang ill-fitted doors is not a good way to spend your time. Avoid the frustration. Get your measurements right before you order your new doors.
If your new DIY cabinet doors are going to be the same size as the old ones, then measuring is a snap. To get the correct size, measure the doors from outer edge to outer edge. Be sure to measure each door individually. Don't assume that they are identical in size even if they appear to be the same dimensions.
Your new doors may have different sizes than their predecessors, requiring you to take the measurements from the frames rather than from the existing cabinet doors. In this case, you'll need to do a couple of simple calculations.
Measure Openings
First, measure the openings from side to side and top to bottom. Next, determine how much of an overlay you will want. The overlay is simply how much of the door itself will overlap the cabinet frame on each side.
Half an inch is a common overlay, but this measurement does vary, depending on the style of the DIY cabinet doors and the width of your frames.
Determine Overlay

Be sure when determining overlay that you consider adjacent doors. You need to ensure that there is enough width on the frame to accommodate both doors, with space for them to open and close without interference.
Add your overlay to the width and height of the opening to arrive at the size of your new cabinet door. Remember to add the overlay twice; the door will overlap the frame on both sides as well as the top and bottom. For example, if your opening is 20 by 26 inches and you want a half-inch overlay, you should order doors that are 21 by 27 inches.
3. Select the Right Style and Material for Your Kitchen
Cost is always a consideration, but don't let a couple of dollars per square foot sway your decision on the material you really want. Remember that you are going to live with these cabinets for a long time.
Stay within your budget, but don't undermine the whole project by settling for something you won't be happy with when the project is done. There are beautiful, high-quality DIY cabinet doors in just about every price range. Take your time and select what honestly suits you and your home.
Raised Panel, Flat Panel, or Slab?
The style of the door is a matter of taste. Consider the age and general decor of your home. Ask yourself these questions:
- What will give you the new look you're after while working well aesthetically with the rest of the interior?
- Do you prefer modern or traditional styles?
- Will your cabinets be natural wood or painted?
Dark colors of wood or paint make a space feel smaller and cozier; they give an impression of weight and solidity. Conversely, light colors make the room feel expansive and spacious. Consider the size of your room and what kind of lighting you have.
A room with high ceilings and lots of natural light can accommodate darker woods and paint colors. If your kitchen is small or lacking in intense light, you will benefit from selecting lighter tones. Keep the hardware in mind; you'll want your selections to complement the style and tone of the doors you choose as well.
Wood or Manufactured Finish?

The traditional belief has been that wood is universally the superior material. Wood is naturally appealing, and it comes in so many species and grains that there is a wood finish for just about any room. Solid wood cabinet doors generally cost more than manufactured materials. The price point adds to the notion that wood is the higher-quality choice.
Like many ideas based on outdated information, this is not always true. Sometimes, the best choice also happens to be economical. There are manufactured DIY cabinet doors available now that are beautiful, durable, and very cost-effective.
Rigid thermofoil (RTF) doors are made using vinyl laminate which is heated and pressurized onto medium-density fiberboard (MDF). These cabinet doors won't warp or crack. They are water-resistant and offer a very smooth finish. If you're planning to paint your DIY cabinets, consider the advantages of these MDF cabinet doors.
4. Order Hardware With Your DIY Cabinet Doors
Choose and purchase everything you will need for the project prior to starting installation. This will ensure that you have the right combination and count of doors, hinges, and handles. Be sure you have the proper tools on hand as well.
Flush Hinges
Flush hinges are inexpensive and simple to install. These hinges are visible after installation. They do not allow for adjustment, so they require careful placement for the proper function of the cabinet doors.
You will need only basic tools to hang flush hinges, such as a screwdriver, a pencil, and an awl. You may also wish to use brackets to keep the doors in position while you install the hinges and a level to ensure that your door fronts line up and hang properly.
Concealed Hinges
As the name suggests, concealed hinges are hidden from view after you close the cabinet doors. These are high-quality hinges; they are heavy-duty and will stand up to years of use. Many of them offer the popular soft self-closing function which draws the door shut slowly and quietly.
Concealed hinges are slightly adjustable after installation. You can easily shift the hinge sideways as well as fine-tune it for the ideal depth. This is helpful when you hang your doors because the hinges are forgiving if the placement is less than perfect. You can also use this feature to make adjustments over time, keeping your cabinets working smoothly even with heavy use.
This hinge style costs more than the simple flush-type hinge and is more complex to install. You'll require specialized tools for this project, and you would do well to practice on a mock-up before you move on to your new DIY cabinet doors. There are some excellent instructional videos demonstrating the process of installing concealed hinges on the internet.
Count Your Hinges
Once you've decided on your style of hinge, you still need to decide how many your cabinets will require. Most kitchen cabinet doors are reasonably small and use only two hinges. Larger or heavier styles may need a third hinge for support.
Two measurements determine how many hinges your cabinet doors will take. One is height; the other is weight. If your doors are under 40 inches tall and they weigh less than 11 pounds, two quality hinges will typically suffice. If they exceed either measurement, add a third hinge in the center.
If you need the third hinge and neglect to install one, the doors can sag or warp. Worse, your cabinet doors may fall off. Save yourself the worry; use the correct number of hinges.
Doors over 60 inches or over 20 pounds can even require more than three hinges. If you have DIY cabinet doors that are this large, check the suggested hinge count and placement from the door maker or the hinge manufacturer. If you are on the cusp of a hinge chart, use the higher number of hinges. Extra bracing will not hurt your cabinet doors, but insufficient support can cause damage and unnecessary wear.
5. Take Your Time With the Installation

You've got your cabinet doors ready to go. You have all the hardware you need, and your tools are gathered and organized. It's time to hang those new doors. Set aside at least twice as much time as you expect the project to realistically take. This one tip will save you more stress than you can imagine.
Work Area
First, arrange a dedicated workspace on a table. You can use two sawhorses and half a sheet of plywood if you don't have an appropriate piece of furniture for the purpose. Your work area should provide a stable surface for your tools and hardware and some space for drilling or driving screws.
Cover part of your workbench with a drop cloth or an old blanket. You'll use this area to lay down your DIY cabinet doors. The fabric will prevent damage such as scratches or dents on your new doors while you attach the hinges and check measurements.
Prepared Meals
Your kitchen is going to be out of commission while you hang cabinets, especially if you are replacing more than a few of them. Plan to have foods that require little or no preparation available for the duration of the project. Hungry people can get short-tempered. This problem is easily avoided. Anticipate and plan for your food needs before you turn your kitchen into a work zone.
Methodical Process
Measure carefully and mark with a pencil before you drill your pilot holes. Pay attention to each step of the process as you go. Ensure that your hinges are properly placed and that your screws are set and driven straight.
Being slow and consistent with each small piece of the project is critical to getting your DIY cabinet doors hung properly. Completing each task correctly even at a very slow pace is faster than having to undo mistakes and redo your work.
When hanging cabinet doors, it's especially important to do careful work because you will do damage to the doors and the frames if you drive screws too deeply or put them where they don't belong.
Finishing Up

Once your installation is complete, your cabinet doors should be very low maintenance. You may need to adjust them over time to keep them level and ensure that they open and close as intended. It is normal for cabinet doors to shift a little bit with use.
If you have any questions about DIY cabinet doors, or if you want to shop a wide selection of high-quality cabinets and accessories, spend some time browsing CabinetNow. We are your source for premium custom cabinetry.
If you are ready to start ordering or if you need assistance, please feel free to call us at 1-855-669-5222 or send us an email at info@cabinetnow.com. Our team of cabinet experts is here to help with everything from measuring to ordering.

