 made in the USA

How To Paint Kitchen Cabinets Like A Pro
When remodeling your kitchen, one of the biggest steps is finishing your cabinets. Whether you choose darker stains, trendy paint, or a natural finish , you will need to have a solid plan and a good understanding of the process. Proper application of your finish is vital to ensuring your cabinets last as long as possible.
In any project, cutting corners will cause issues. Skipping steps, or not executing them properly, can shorten the lifespan of your cabinets. Also, it can give you lackluster results. While properly finishing cabinets can be costly and time-consuming, it is much cheaper and quicker than having to do it twice.
So, to help you complete your project, we have created the definitive guide to finishing your cabinets . In addition to product recommendations, you will also get to hear advice from our experts that can help you achieve your kitchen dreams.
Table of Contents
- Plan Your Project
- Consider Your Climate
- Find Your Finish
- Pros & Cons of Paint and Stain
- Painting
- Drying Time For Paint
- Staining
- Drying Time for Stain
- Clear Coat
- Finishing Touches
Disclaimer: This blog post contains affiliate links and we may receive a small commission for purchases made. These are products we highly recommend.
Have a Solid Plan For Finishing Your Cabinets
The first step to all home projects is having a solid plan for finishing your cabinets . This does not mean that your plan will be set in stone, but rather it will evolve alongside your project. Whether you are finishing your cabinets for the first time or refinishing them, it can be a costly endeavor.
Making a solid plan can be a difficult thing to accomplish if you don’t know all the elements involved . To help you get a rough idea of the costs for finishing your cabinets, check out HomeAdvisor’s refinishing calculator. They gathered information on home projects from across the country, and this information can be a great starting point for making your plan.

From the costs to rent equipment, to labor, and the finishes themselves, there is a lot involved in budgeting out for finishing your cabinets. To help you make sure you account for all expenses, here is a quick list of products we love and you will likely require for your project ( if you don’t have them already ):
- Protective Mask
- Gloves
- Reusable Drop Cloth
- Painter’s Tape
- Kreg Hardware Jig
- Handy Paint Cup
- Sprayer
- Brushes
- Drying Rack
Much like your budget and timeline, this list will need to be flexible, as your project’s shape will change as it is carried out. Be sure to budget for unforeseeable delays and extra expenses, as even the best-laid plans often go awry.
If you are looking for more information on tools you may need, check out Dengarden’s article on essential tools for painting cabinets!
Ideal Conditions for Finishing Cabinets

On top of planning your budget for finishing your cabinets, you will also need to make a schedule for your project. For this, you will want to plan the time of year for your project . The main concerns in this regard are the temperature and humidity. If either is too high, or too low for temperature, then your finish may not set properly or your wood could become warped.

Having the right conditions for your project will help with drying times. Hear what our Director of Operations Joe has to say on the topic:
Where and when to finish your project? The important thing to remember is to stay clean and relatively dust-free, which for most of us is impossible, so keep your workspace clean and protected. For the best results, maintain a moderate temperature of about 70 degrees, but when this is not possible keep the air moving, even slightly can help with drying times. On a hot day, warm air naturally rises drawing in cool air to replace it at the surface. If you are working on a cold day, the air stagnates and less air passes over the project, which slows drying.
For humidity, you want to be sure it is within the range of 50-70% . If it has recently rained, you will most likely need to postpone your project for a few days, or until the humidity falls back within the safe range for finishing.
Choosing a Finishing Method for Your Cabinets
Choosing the correct paint and primer, or wood conditioner and stain can be a difficult task , especially if this is your first time finishing cabinets. It can be tough to know what is the best option for you.
First, consider
the style you are looking to create.
For example, a
cherry
stain
on a baroque, raised arch panel door, like our Liberty cabinet door, can create a stunning,
timeless look.

Or, if you arelooking for something more modern, a paint finishing on your cabinets might be a better choice. Just as there are many options for stains, paints come in a wide variety of colors. For example, our sleek Baldwin cabinet door could be painted with Benjamin Moore’s Aegean Teal color, which is their color of the year for 2021, to achieve a trendy, modern aesthetic.
Pros and Cons For Finishes

If you have a few ideas for stylistic direction, but you still aren’t exactly sure how to move forward, we suggest you make a pros and cons list . This can be a quick way to get an understanding of the benefits and possible drawbacks of each finishing method for your cabinets.
Paint
If you are thinking of bright colors, modern trends, or bright whites, then a paint finishing can be a great choice for your cabinets. In addition to the wide variety of colors, paint is also easier to remove if you decide to change your look at a later date.
However, paint finishes do have a couple of drawbacks. The first of which is that a paint finish is not as strong as a stain finish. Another possible drawback of using paint is that it obscures the natural beauty of the wood. Although, if you are working with MDF, an excellent choice for painting, this is not an issue, as MDF does not have a grain pattern or other natural features.
Stain

If you are in the market for something timeless and traditiona l, then a stain finish might work best for you. Using a high-quality stain for finishing your cabinets is a great way to not only protect your doors, but it is also will highlight the natural beauty of your wood’s grain pattern . Another great benefit of choosing a stain finishing for your cabinets is that it is a very durable option.
Like most things, these benefits do come at a cost. Stains can be a bit more difficult to work with as they are not as forgiving as paint. What’s more, the stain is also difficult to remove once it is applied, because it soaks into the grain of the wood. This means that if you wanted to change the color of your stain later, it is more difficult.
Before You Start

There are a few important things you should keep in mind before you start finishing your cabinets. First, you want to be sure to read all the labels on the products you are using , as these will have important information about safety measures you will need to practice. Next, you will want to be sure you have all of the surfaces that are not going to be finished properly covered with painter’s tape.
For yourself, you will want to be sure to have a good protective mask and a pair of gloves. You should make sure the space you are using has good ventilation, as this will prevent you from breathing any toxic fumes and help with drying times while finishing your cabinets.
Finally, when removing doors and drawer fronts, don’t forget to label everything . This will help you avoid a massive headache later on when you go to re-mount the doors and drawer fronts.
Special Note For Brushes
The best option for painting cabinets is to use a paint sprayer. However, this equipment can be costly to buy or rent and require a bit of know-how. But, don’t lose heart. If using a paintbrush for finishing your cabinets is the only option, you can still a beautiful result. It will take longer, but going slow and ensuring all strokes are even and neat is crucial.
After each coat dries, inspect the surfaces to make sure there are no visible brush strokes, unevenness, or bubbles. If you do notice these, you should lightly sand the problem areas with the 220-grit paper before applying the second coat. Just like with the first, inspect the door and address any issues. Two coats could be sufficient for finishing your cabinets, but if you need to do another, just repeat the steps above.
Finishing Cabinets with Paint
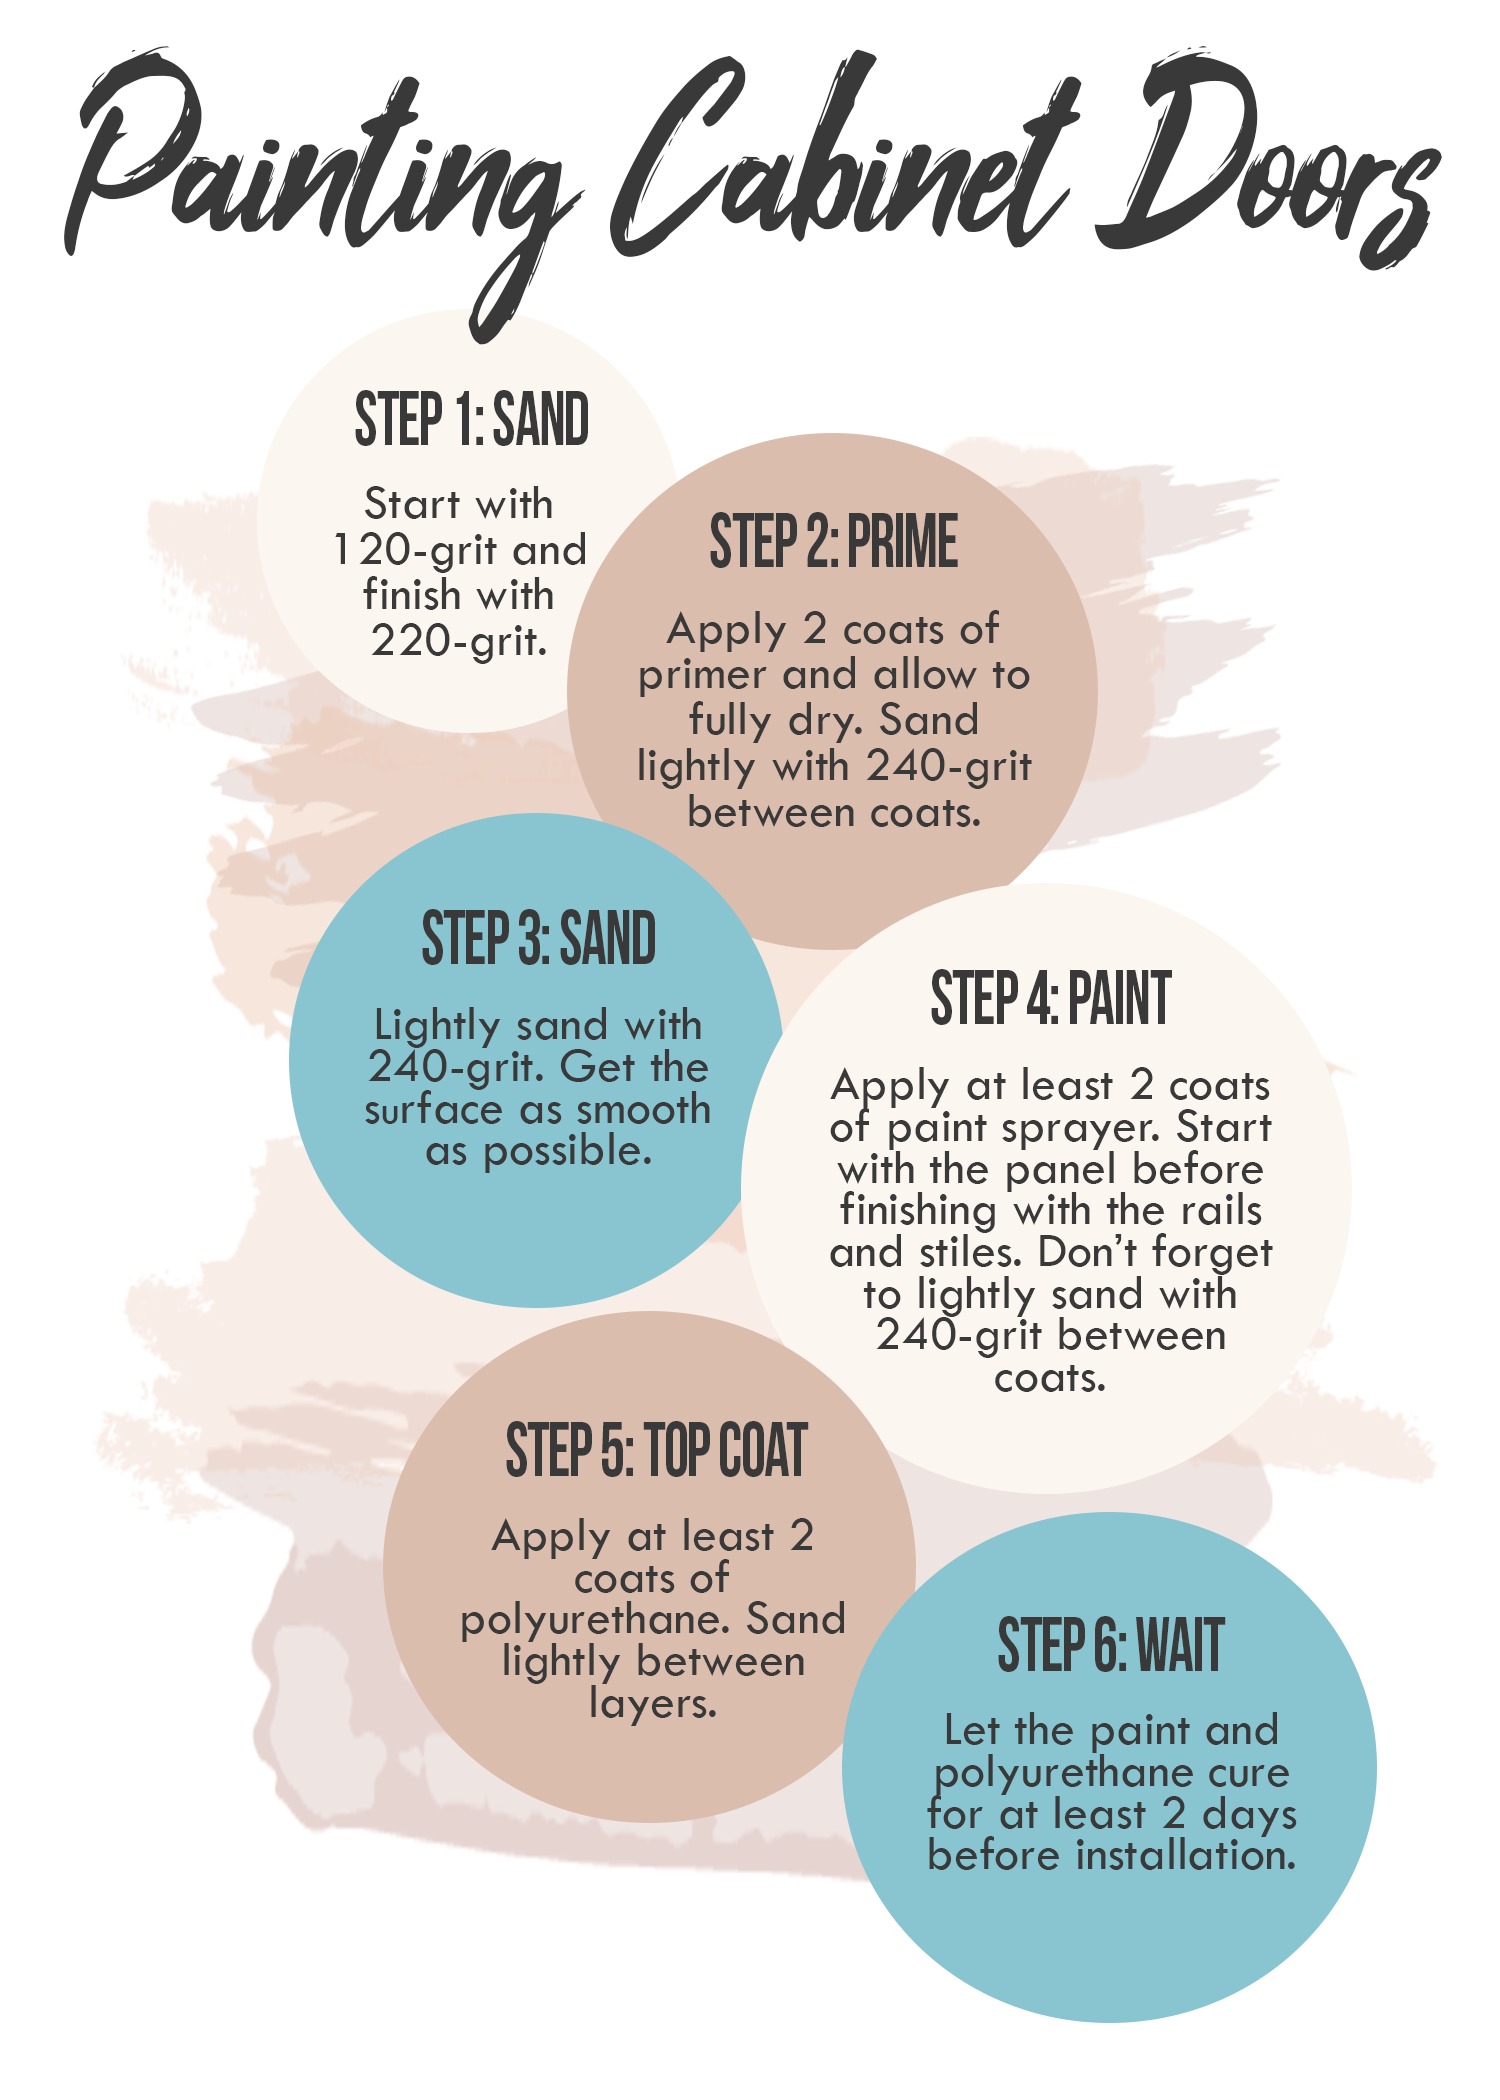
Steps
1. Sanding
The first step for painting cabinets is ensuring that all surfaces are sanded smooth . This is a step that you will need to take your time with, as any uneven spots will be noticeable after you paint.
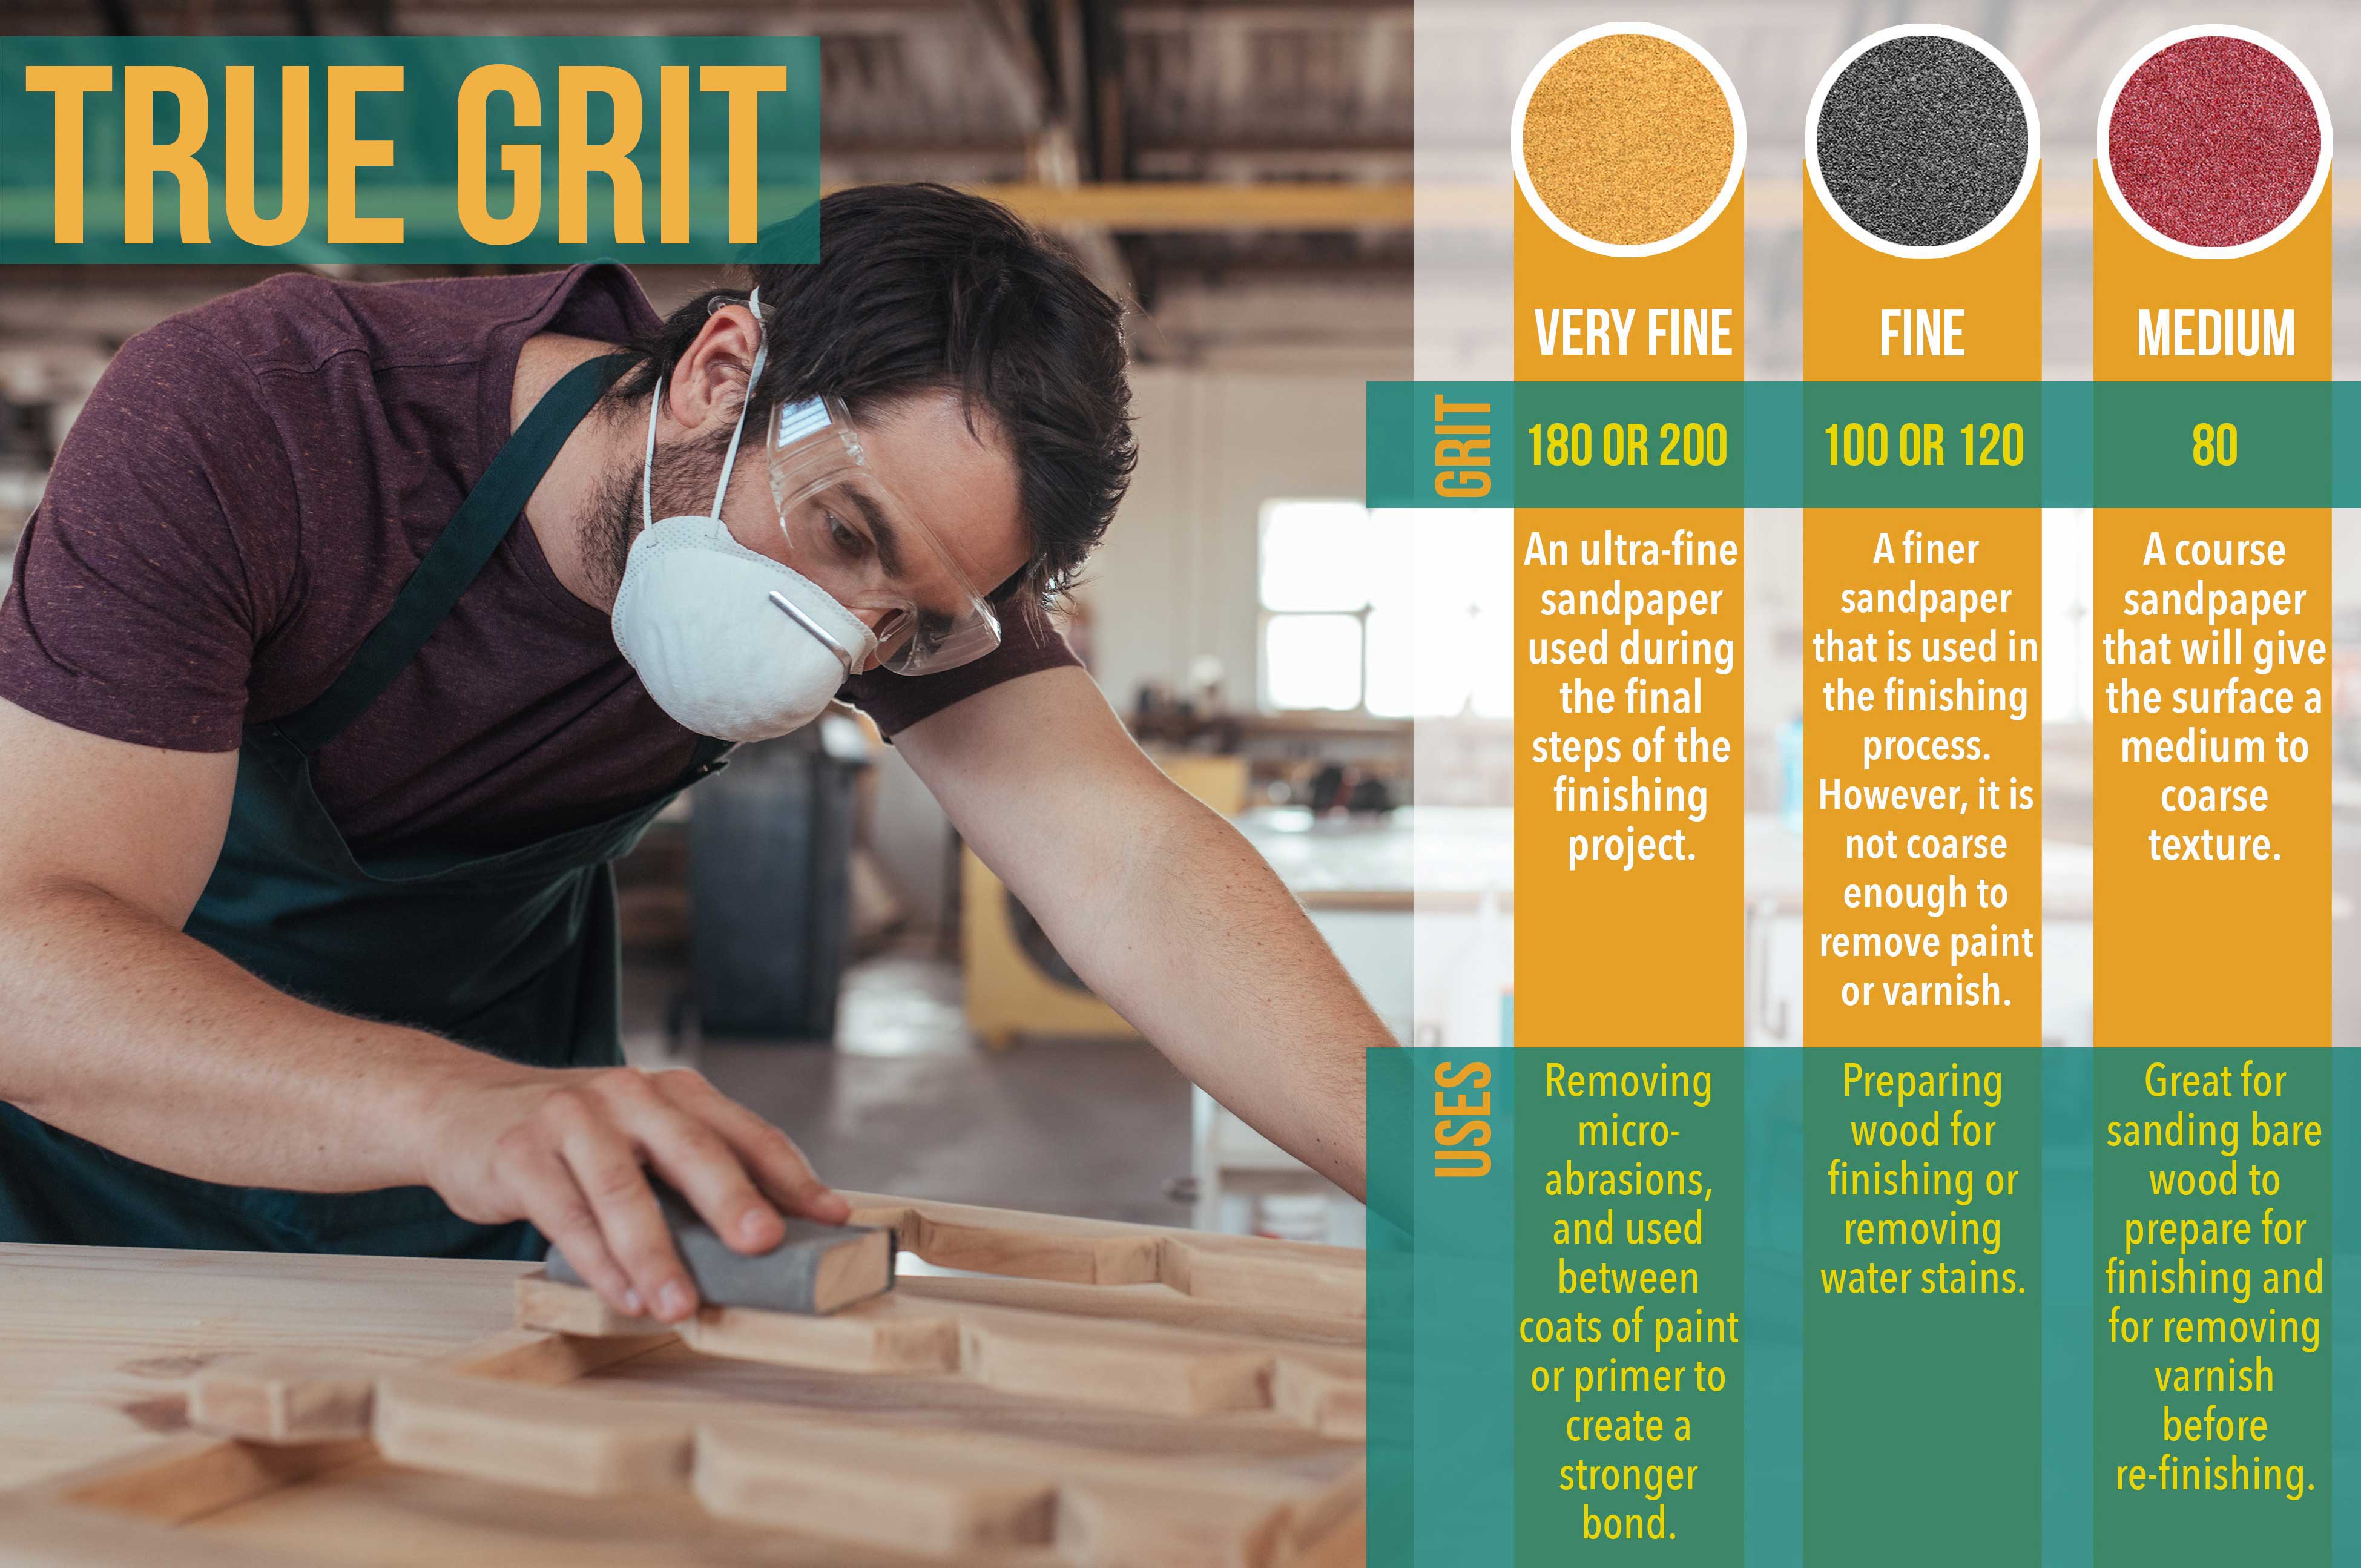
To tackle this step you will a power sander, sandpaper, and a sanding sponge. You should begin with coarse sandpaper, around 120-grit, and work your way up to a finer, 220-grit, sandpaper. As you work, you should use your tack cloth to keep your surface clear of debris.
After your final wipe-down, take a moment to thoroughly inspect your work. If you notice any rough areas or damage, be sure to address them appropriately before moving on. If you choose to order your doors from us at CabinetNow, our unfinished doors arrive pre-sanded to a 220-grit and ready to finish.
2. Primer
After finishing sanding your cabinets, it is time to put down the primer. This step is critical for achieving the best result. The primer will be the foundation that your paint will hold onto later. While some brands offer a paint and primer in one, we recommend using separate paint and primer to get the best results. You should plan to apply at least 2 coats of primer before moving on to paint .
After each coat is dry, you should lightly sand the surface with 220-grit sandpaper. This will create a textured effect that the next coat will cling to. Remember to clean your surfaces after sanding each time.
3. Painting
For the best results, we recommend using a paint sprayer. The paint sprayer will apply the paint evenly, and you won’t have to worry about the brush strokes. You will need to maintain a steady distance from the door as you spray, moving across the door slowly and evenly.

You will also need space for your doors to dry. There are lots of options available for drying racks and stacking tools. The benefit of the stacking tools is that they are easily storable when not in use. As your doors dry, be sure to keep the air moving and the doors out of direct sunlight.
Whether you are using a sprayer or brush, you will need at least two coats of paint. Once each coat fully dries, you should lightly sand the door with 220-grit sandpaper before putting down your next coat.
Pro Tip from Our Expert
As you can tell, painting your cabinets is not an easy task , so don’t be afraid to seek advice.
Here is some advice from our Sales Manager Andrew:
Be realistic with what you as a homeowner are capable of accomplishing. Practice first with the finish that you want to apply to your cabinet doors. Remember: professionals are the experts and don’t be afraid to ask for help from them.
Drying Time
While the exact timeline will vary, it will take around 1-2 weeks for your cabinets to be dry to the touch, and then around a month to cure. While the cabinets are curing, you must treat them lightly. The curing processing for your cabinets can take up to 3-4 weeks.
Once the curing process is complete, your paint will be at its strongest!
Special Note for Oil-Based Products
If you are working with oil-based paint, your drying time will be longer. Also, oil-based paints will have an odor, so having proper ventilation is key.
Finishing Cabinets with Stain

Unlike a paint finish, stain finishes soak into the grain of your wood surfaces . This means that if you plan to do a stain finish you can’t use materials like MDF that lack a grain pattern.
If you are looking to create a traditional feel in your kitchen, you should consider using a stain finish. A stain finish on your cabinets will highlight the natural beauty of the wood and grain pattern. This is why it is important to pick high-quality materials, as any imperfects will be noticeable after the stain dries. If you choose us for your cabinet doors, we offer a select grade for our wood types that has even, beautiful color and grain pattern.
1. Sanding
Like with painting, it is important to ensure that the surface you are working with is smooth and even . You will need to start with coarse sandpaper of around 80 to 120-grit. Remember to keep a tack cloth handy as you work, so that you can keep your surface clean and debris-free.
From here, you will want to work up to finer sandpaper of around 220-grit. Once your doors are sanded smooth and clear of dust and debris. If you choose to get your unfinished doors from us at CabinetNow, they will arrive pre-sanded with 220-grit paper and ready to be finished.
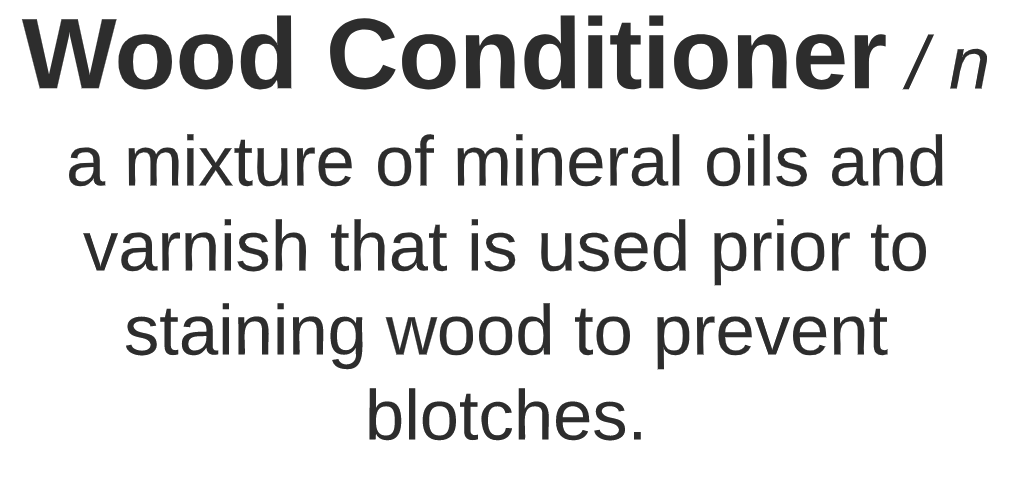
2. Wood Conditioner
Just like with painting, you will need to put down a foundation. For stains, this foundation is called a wood conditioner. A wood conditioner is a mixture of mineral oils and varnish that is used to prep your surface for staining. The wood conditioner helps to fill in the grain on the wood, meaning your stain can be applied more evenly.
Using a wood conditioner also makes re-staining easier. This is because the stain will not soak as deeply into the wood and less will have to be sanded off when re-finishing.
When planning to apply your wood conditioner, you will need to be sure you have the ideal conditions. For the best results, you should plan your project for a day with around 70 degrees Fahrenheit and 50-70% humidity. You will need to allow for at least 30 minutes for the conditioner to dry, but you should not wait longer than 2 hours to apply your stain.
3. Staining

Just like paint, there are various types of stains with different bases. Be sure to carefully read all the instructions as well as the safety and warning labels on your products before starting. Water-based, wipe-on stains can be an excellent choice for first-timers and experts alike. Be sure to note the base your stain uses, as oil-based stains will have an odor and you will need proper ventilation.
There are also gel stains, like those from the Saman brand, that can be ordered in a wide variety of colors. Regardless, you will need to be sure to apply the evenly with the grain pattern.
If you are looking for some advice, here is an expert tip from our Inside Sales Associate Jason:
Always wipe your excess stain off going in the direction of the grain. This will ensure the stain goes into the wood instead of laying on top of it. It also shows the grain off to its best advantage.
Drying Time
With the right conditions, 70 degrees Fahrenheit and 50-70% humidity , you should allow for 1-2 days for the stain to dry on your cabinets. During this time, it is important to keep air circulating, as this will help the stain dry and help with the odor. Also, be sure that no dust or debris settles on the doors, as these can become sealed to the surface.
Drying time will be affected by the weather on the day you complete the project. Like the wood conditioner, you should plan for a day with around 70 degrees Fahrenheit and 50-70% humidity. If it has recently rained, you will need to wait a few days for the humidity to come back down.
Your stain will take at least 1-2 days to dry, but your base may extend this time period. Be sure that you have good airflow in the space your cabinets dry, as this will help with drying time and keep the odor down. You also want to be sure not to have your doors in direct sunlight as they dry.
Clear Coat Finishing Cabinets
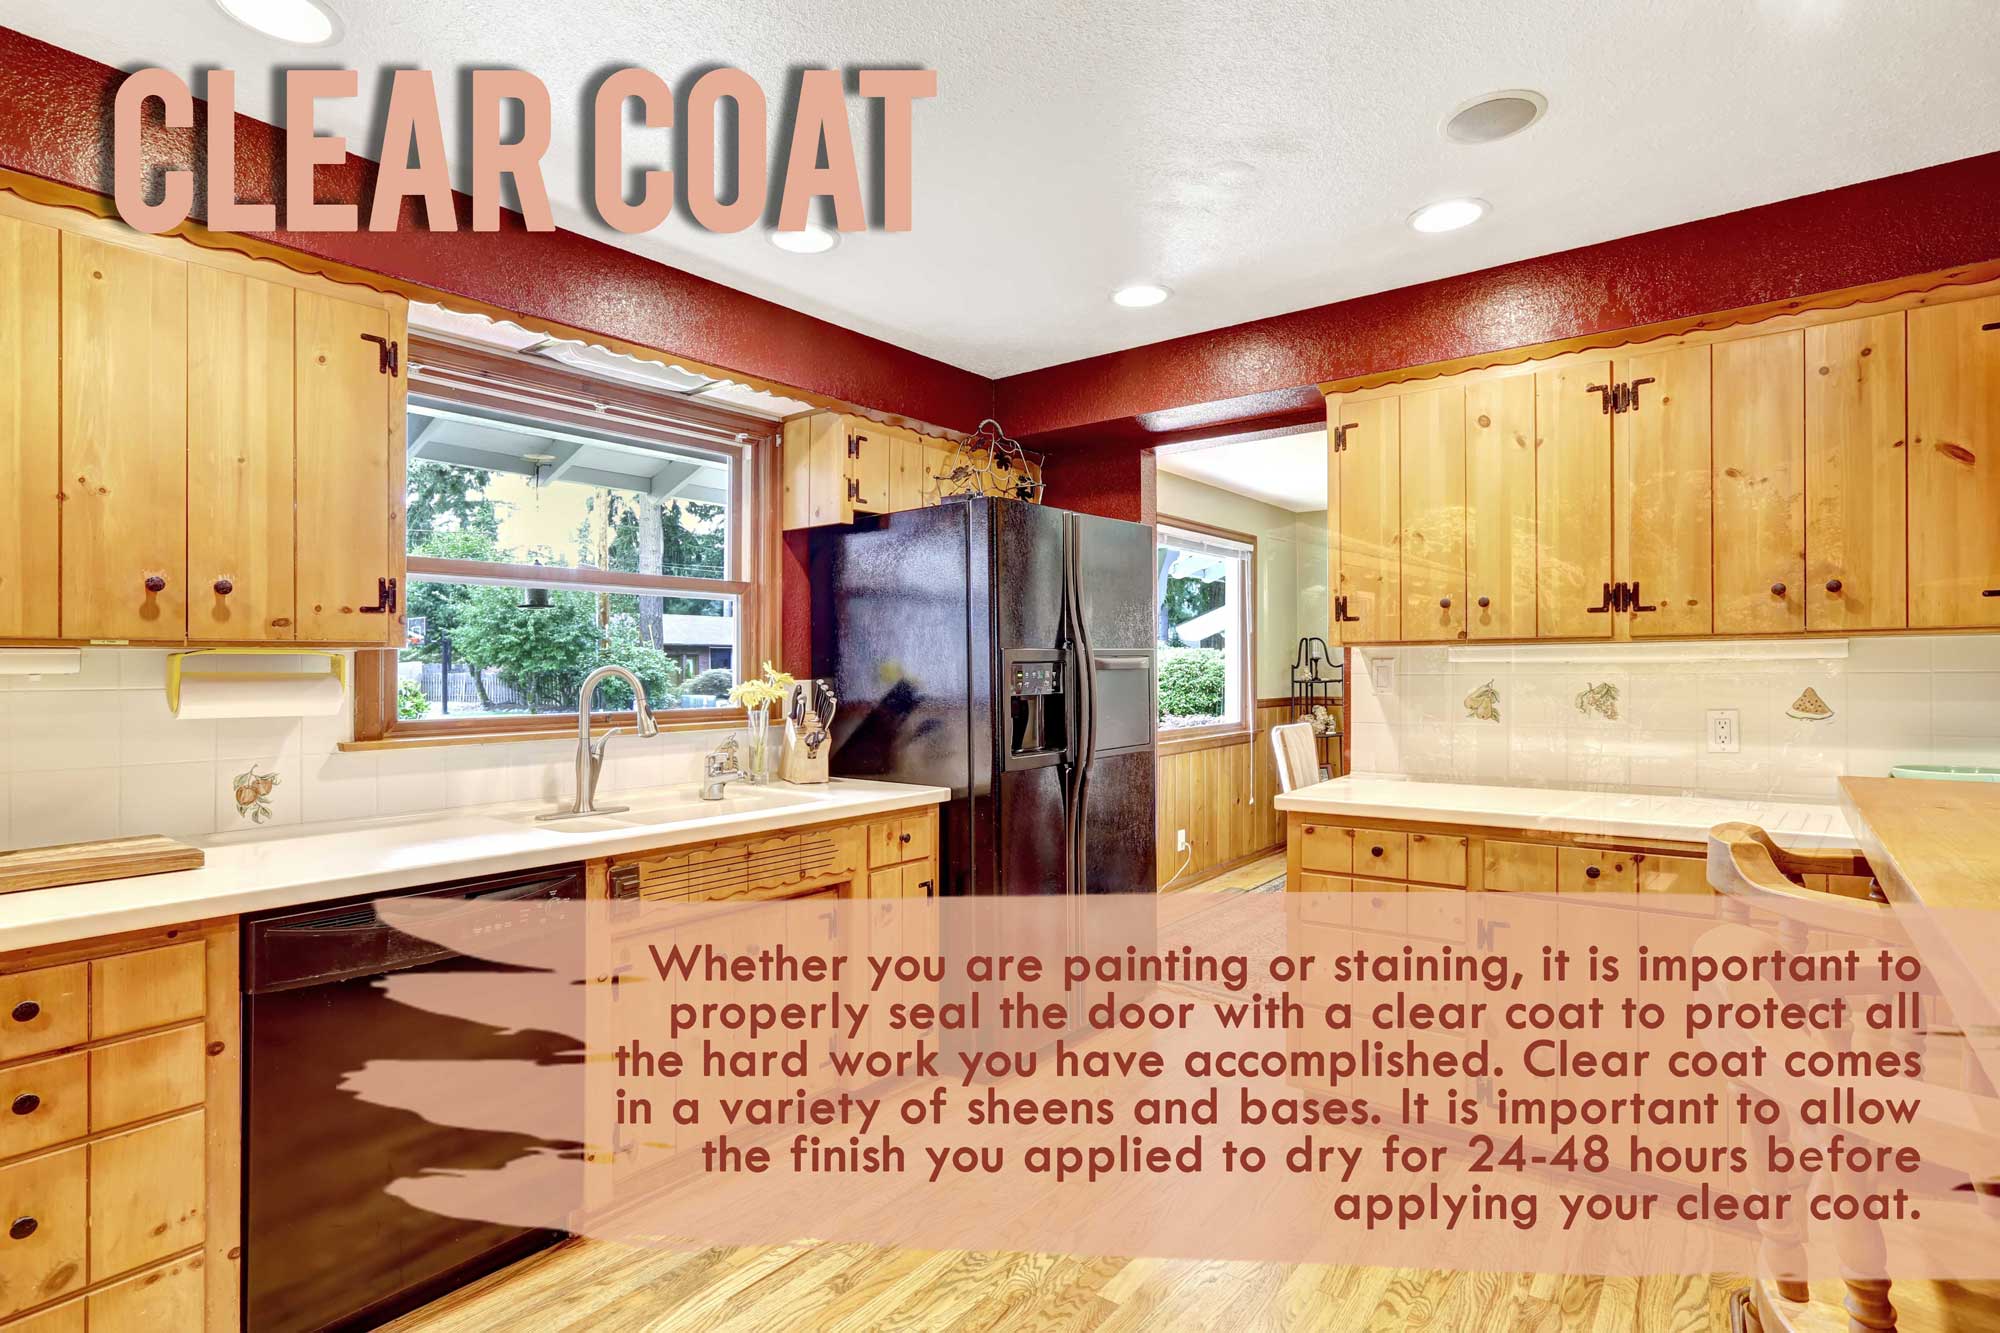
A final step that can easily be overlooked is the final clear coat step . A clear coat is often a polyurethane finish made with a water-base. Polyurethane is a polymer composed of organic units joined by carbamate links. In other orders, it is a liquid plastic seal that will dry and become a solid. Like a stain, polyurethane has an odor so be sure to have proper ventilation during application and drying .
Clear coats come in a variety of sheens like paint. If you are looking for a quality topcoat that can be ordered in any sheen you need, General Finishes makes a quality that can be ordered from flat to gloss. It is a water-based polyurethane finish, and it should be noted that it can cause yellowing on white paints. It can also have this effect on other lighter colors, but not to such an extent.
When your chosen finish has had enough time to dry, it is time to apply the clear coat. Just like with paint and stain, you will need to lightly sand the surface to start with fine, 220-grit, sandpaper. Next, carefully apply the clear coat with even strokes.
Drying Times
For drying times, this will also depend on your base. For oil-based polyurethanes, be sure to check the manufacturer's recommendation for dry time. Once the first oil-based coat has dried, lightly sand with fine sandpaper and apply your second coat.
For water-based, you should allow for 1-2 hours for dry time. Then you can apply your second coat. For most water-based, you do not have to sand between coats; however, check the manufacturer’s recommendation for application before starting.
While not having to sand between coats is a benefit of water-based polyurethanes , they do have the drawback of not being as strong as their oil-based counterparts. This means that water-based polyurethanes will require more than the two coats needed for oil-based.
Looking for Alternatives?
What seems like a simple task, painting or staining cabinets, is actually a rather involved and challenging one. If you are feeling a bit overwhelmed at this point there no need to worry. There are options available to you if this seems like something outside your comfort zone.
For those with the budget, hiring professionals is one way to eliminate the stress and labor involved in finishing your cabinets. While it may raise your budget, professionals work quickly and already have the proper equipment for the job. This means hiring professionals can actually shorten your timeline.
Another option available is to order a material like Thermofoil. For those who are unfamiliar, thermofoil is a vinyl laminate that is heated and pressurized onto a Medium-density fibreboard (or MDF) core. By choosing thermofoil, you will be able to choose from a wide variety of not only colors but also textures and grain patterns. The best part is that these doors arrive fully finished.
Hear our Inside Sales Rep Taylor’s thoughts on thermofoil:
Thermofoil comes in different textures, so you have more choices without having to do the work of finishing the doors yourself. In addition, MDF isn't going to warp or twist. So, Thermofoil can be better for large doors or panels. And you don't have to do an added center rail for larger doors if you don't like the look of it.
Final Thoughts on Finishing Cabinets

There is a lot that goes into properly finishing your cabinets. However, this is an extremely important process, as it not only helps create your aesthetic but also protects your cabinets from wear and tear. To best execute this project, you need to have a solid plan and an understanding of the materials you are working with. Be sure to carefully read all warnings and safety guidelines for the products you use, as improper use can lead to subpar results.
While it may not be easy finishing your cabinets, the result will be more than worth it! With so many options, you will be able to create an aesthetic and feel to your space that is truly your own.
If you are struggling to get started, or are ready to start ordering, please feel free to give us a call at 1-855-669-5222 or an email to info@cabinetnow.com.

