made in the USA

How To Assemble Base Cabinet Boxes
Getting your cabinet box out of its packaging and ready to mount will require some assembly and a mild amount of craftsmanship, but overall this is a pretty quick project when you know what you are doing. All the information you need is available right here, so to make your cabinet box's construction as painless as possible, let's start by making sure that you have the required materials before we begin.
Materials:
- Cabinet Box
Each component of your cabinet box, such as the frame and the individual walls of the box, will arrive unattached and will require your assembly.
- Wood Glue
This will be the primary adhesive used to hold your box together, and will be necessary during multiple steps of this project.
- Staple Gun/ Finishing nails and hammer
For the last stage of assembly, we will need to staple the components of your cabinet box together.
While a hand-stapler can work in place of a staple gun, a staple gun is recommended as it will generally allow for a faster assembly process and reduce the difficulty of labor that comes with manually stapling wood. There is also the option of using finishing nails and a hammer, which is the method we used here, but increases the risk of potential damage to your box if you were to swing and miss.
Assembly:
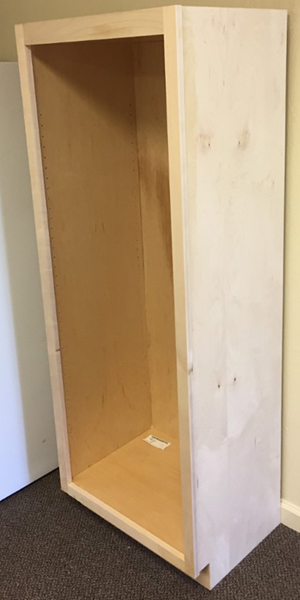
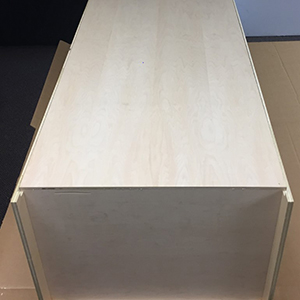
The box we will be assembling is a pantry cabinet box. While there are numerous types of boxes the basic assembly process is relatively the same. Putting your cabinet box together is easy enough, and really comes down to placing the right pieces together in the correct order. At the very least, your cabinet box should come with:
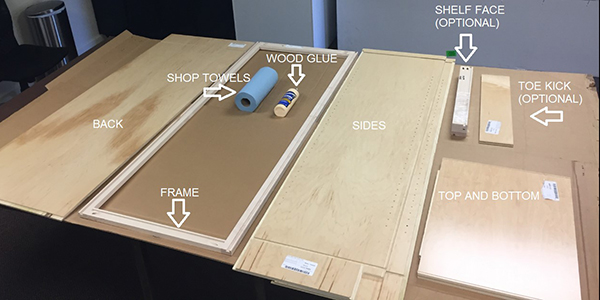
- 1 Frame ‒ Large open piece with a hollow center.
- 2 Sides ‒ Large wall pieces that have grooves located on two edges for connecting to the Frame and Back.
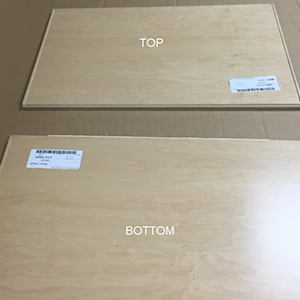
- 1 Top and 1 Bottom ‒ These two are easily identified as the small end pieces of your cabinet box.
- 1 Back ‒ The same size as your Frame, but will have a closed center.
Clean work surface
A clean work surface is necessary when assembling your cabinet box. The easiest solution is to open the cardboard box the cabinet box came in and use that as a work surface.
Categorize Each Piece
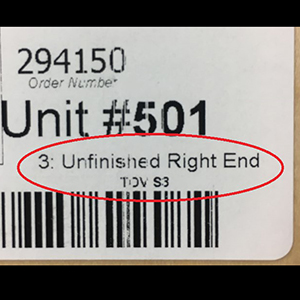
Each piece is labeled with its position. Be sure to check each piece before assembling.
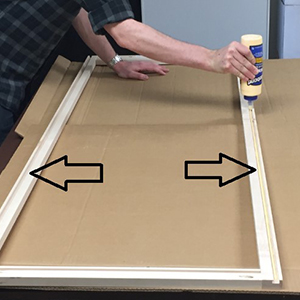
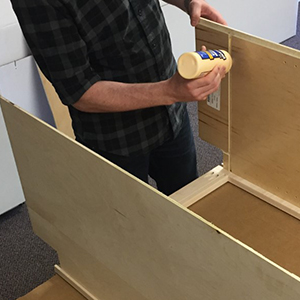
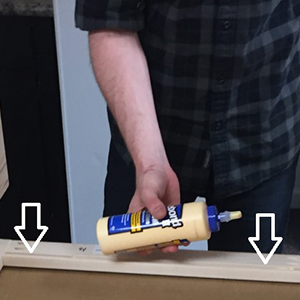
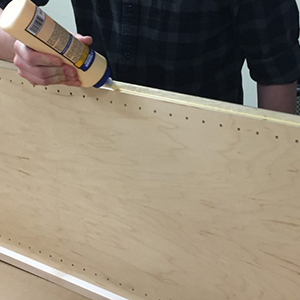
STEP 1: Add a Bead of Glue to the Face Frame
- Position your face frame so the notching area is facing up
- Take your wood glue and carefully run a bead inside both sides of the face frame notching area
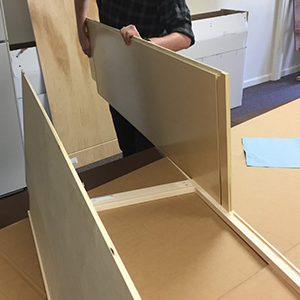
STEP 2: Connect your Sides to the Frame
- Take your freshly glued frame and slide your sides into the notching areas of the frame so that they rest in their intended positions. Wipe away any excess glue as you go.
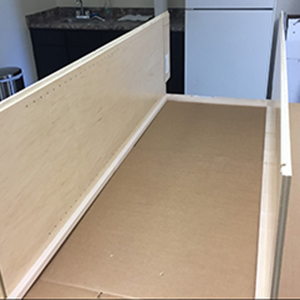
STEP 3: Connect the Top and Bottom
- Run a bead of glue along the vertical notching areas where the top and bottom pieces will slide into
- After running a bead of glue along both sides of the nothing areas, run one more along the face frame notch on the bottom
- Now that all 3 sides have a bead of glue, gently slide the bottom piece into the notching area until it rests flush against the face frame. Repeat the same process for the top piece.
- Make sure the top and bottom are secure and wipe away any excess glue
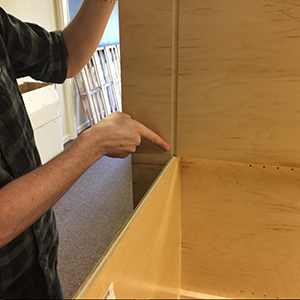
- At this point your cabinet box should be taking shape, with four walls facing upward and only the back end remaining unattached.
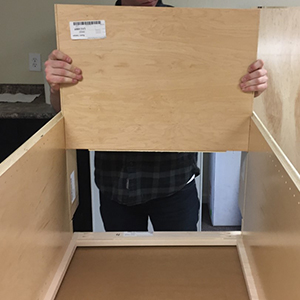
STEP 4: Connect the Back to the Cabinet Box
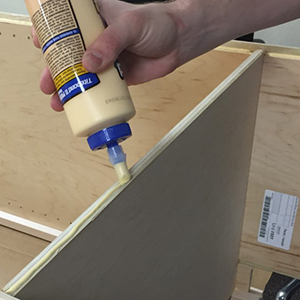
- Take your wood glue one last time, and run a bead over each exposed top-edge of the connected pieces.
- Once all exposed edges have beads of glue, carefully take the back piece, and line the notches up with the vertical top and bottom pieces.
- Once the back piece is lined up, gently lay the back piece down so it rests inside the grooves and notching areas.

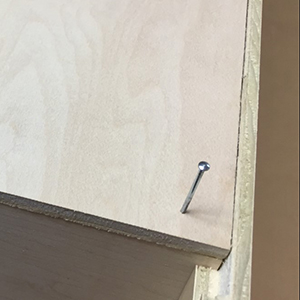
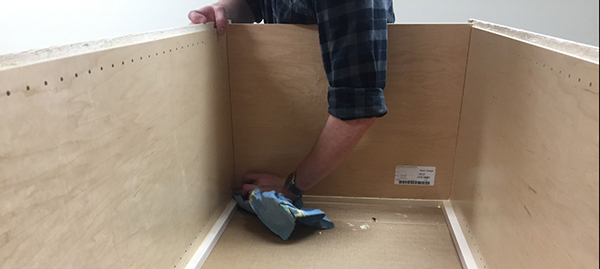
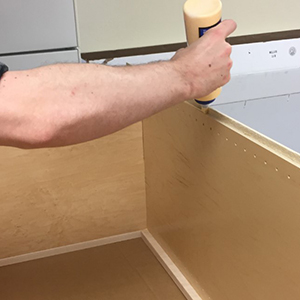
STEP 5: Secure the Back of the Box
- Either use a staple gun or finish nails and a hammer to secure the back piece to the cabinet box.
- Once all pieces are secure be sure to wipe down all excess glue. Using a damp towel can help to remove glue that has started to dry.