 made in the USA

How To Assemble Vanity Boxes
- Vanity Box
- Wood Glue
- Staple Gun/ Finishing nails and hammer
- The last step of assembly will require stapling the components of your cabinet box together.
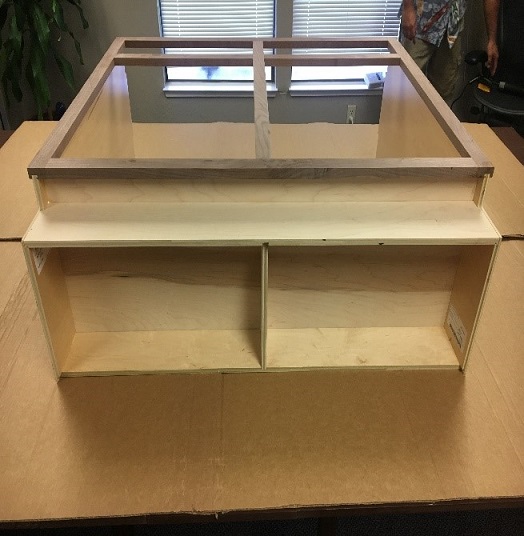
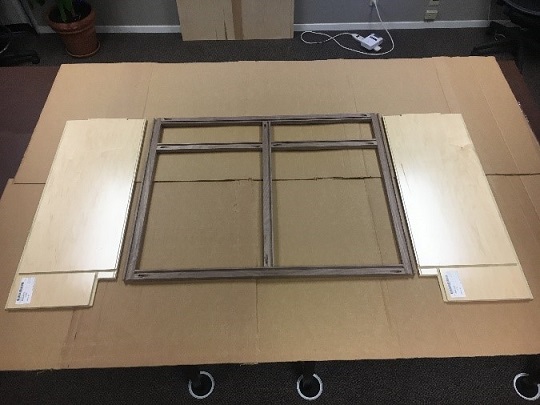
- 1 Frame ‒ Large with four places for cabinet doors and drawers
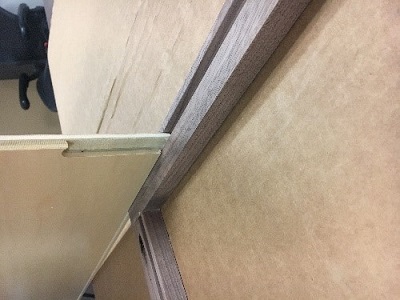
- 2 Sides ‒ Tall pieces that have grooves located on two edges for connecting to the Frame and Back. They are labeled left and right and have a cutout to fit the toe kick
- 1 Bottom ‒ This piece is approximately the same size as the side, but without the cutout
- 1 Back ‒ The same size as your Frame, but will have a closed center
- 1 Toe Kick – Has a groove down the center and one on each side
- 2 Top Spreaders – Long thin pieces that will rest on the top of the vanity
- 1 Toe Kick Spreader – Will be placed in the middle of the toe kick for added support
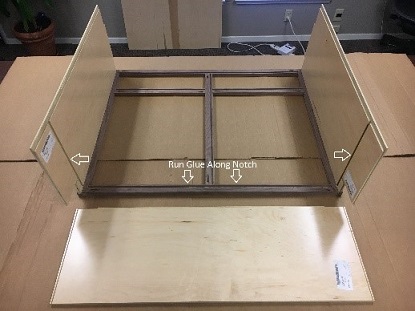
- Separate the frame and side pieces as they will be assembled first
- Position your frame with the notched side facing up
- Carefully run your wood glue both sides of the face frame notching area
- Slide the sides into the notches areas. Be sure to match the proper sides with the correct notches, keeping the toe kick at the bottom of the frame.
-
- Wipe away excess glue
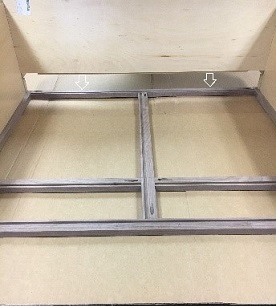
- Carefully slide the bottom piece in along the glued notches
- Wipe away excess glue
- Carefully run glue along the edges of the bottom piece and both
sides
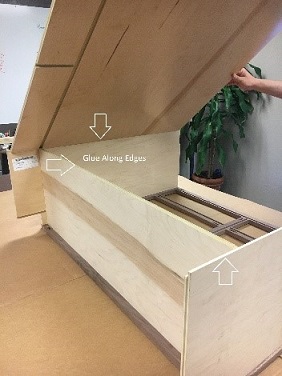
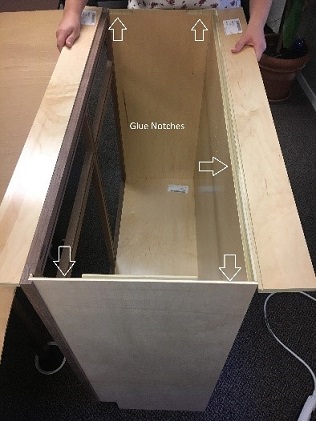
- Lift the back piece making sure the notches on the back line up
- Place the back piece down and fit the side and bottom pieces into the notches on the back piece
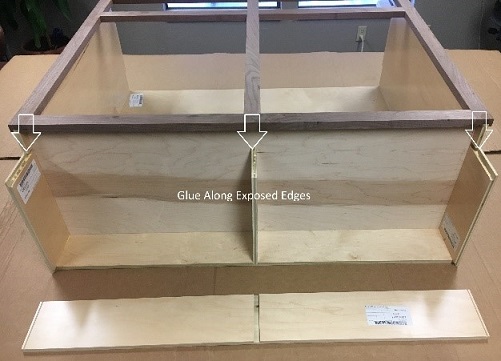
- Wipe away excess glue
- Tack down the back along the side pieces, bottom, and top to add support to the structure
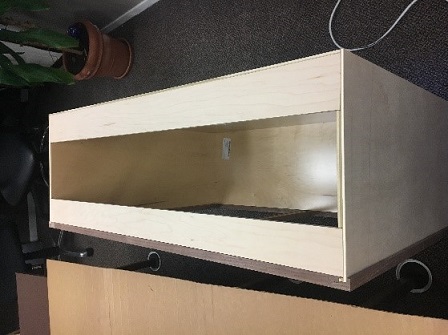
- Gently turn the vanity box over so it is lying on its back with the frame facing up
- Run wood glue along the middle notch on the back piece, located in the toe kick
- Locate the toe kick spreader and stand it in the freshly glued notch
- Carefully run glue along the exposed to edge of the toe kick
spreader and the side pieces
- Now stand the vanity box upright
- Run glue along the notch on the top of the back piece and the notches on the side pieces
- Fit the notched top spreader onto the glued back notches
- Finish the vanity cabinet by tacking the spreaders into the sides
- Run glue along the notches on the sides, near the frame, and fit the other top spreader into the notches.
How To Assemble Vanity Boxes
Materials:
Each piece of your vanity box, such as the frame and the individual walls of the box, will arrive ready to assemble.
This will be the key component used to hold your box together, and will be necessary during numerous steps of this project.
A staple gun is recommended for ensuring the stability of the vanity box as it allows for a fast assembly and tends to be accurate. Finishing nails and a hammer are another option but risk of missing the nail and hitting the wood makes this a less ideal decision.
Assembly:
Assembling a vanity box is a fairly quick project that does not require a large amount of craftsmanship. This tutorial will provide you with all the information you will need to know to construct your vanity box and help make the process as easy as possible. Let’s start with the pieces your vanity box came with:
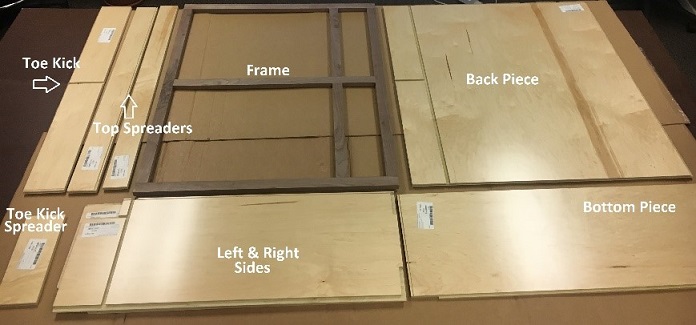
Each piece is labeled with its position. Be sure to check the labels before beginning assembly.

Protect your Surface
Working with wood glue can get messy. To avoid getting glue on your work surface, we recommend opening the cardboard box your vanity came in, and using it as a protector for your surface.
STEP 1: Connect the Frame to the Sides

STEP 2: Add the Bottom to the Frame
Run wood glue along the bottom notches of the side pieces and along the bottom notch of the face frame
STEP 3: Place the Back Piece
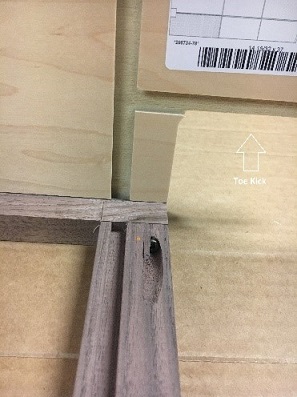
STEP 4: Fitting the Toe Kick
Tack the sides to the toe kick
Line the toe kick notches up with the glued edges and fit the toe kick into place

