 made in the USA

Customer Success Spotlight: Deb and Chuck
In our last customer success spotlight, we took a look at Tom and Linda’s complete kitchen remodel. They tore their kitchen down to the studs and gave it a beautiful make-over. This week, we are excited to dive into Deb and Chuck’s project. Instead of a full remodel, they choose to reface their kitchen cabinets. However, just because their project was smaller in scope, don’t think that the end result was not a complete transformation.
Refacing is the process of replacing your cabinet doors and drawer fronts, and then refinishing your cabinet boxes to match. This is a great way to give your kitchen a new look at a more affordable price. Let’s get started!
Measuring, Designing, and Measuring Again
Deb and Chuck are no strangers when it comes to home improvement. After working on their previous home for over 30 years, they purchased a 60’s farmhouse and got started on a whole new list of projects. This included remodeling their bathrooms and other rooms throughout the house. Last July, they began to plan the final piece: the kitchen.
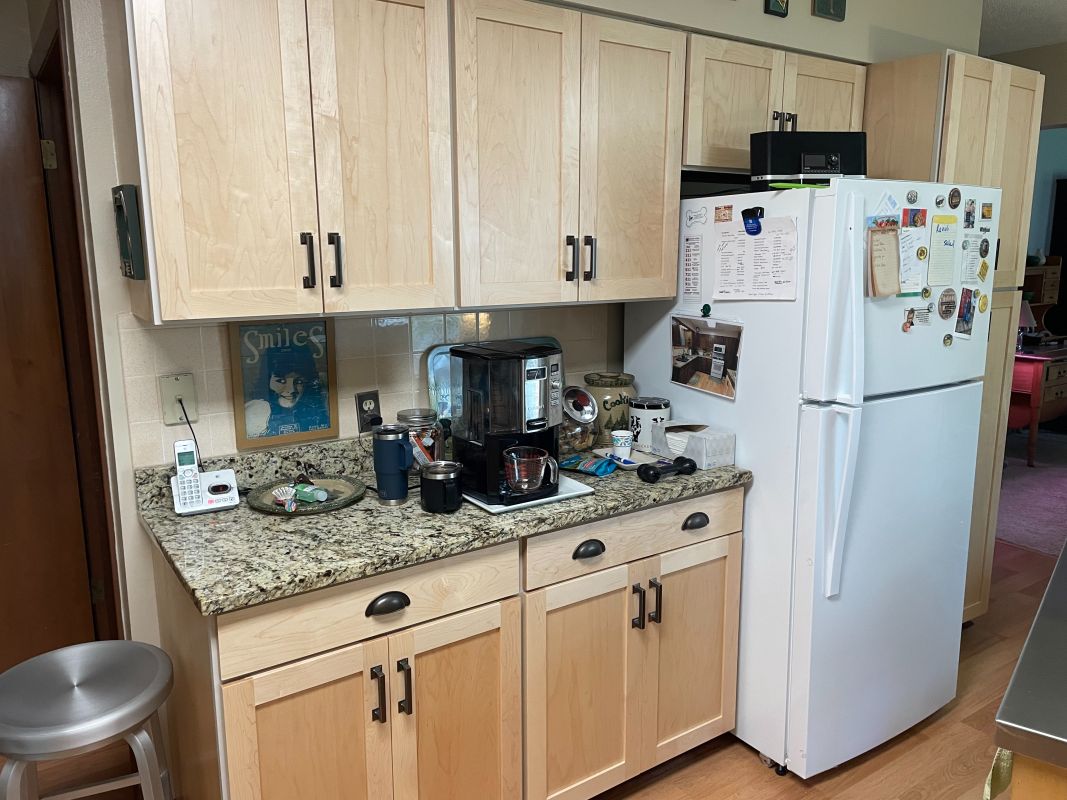
Deb and Chuck’s old kitchen featured dark cabinetry with raised cabinet doors and matching drawer fronts. After inspecting the cabinet boxes, it was clear that they were still in good shape. This is why they choose a cabinet refacing project instead of tearing out the cabinet boxes.

The old kitchen with one section with new doors
As you can see, these are well-made, solid wood cabinets, but they are very much out of style. The center placement of the hardware was one area of frustration that this outdated style created. Plus, the darker finish on the cabinets makes the room feel a bit darker.
Since they are seasoned DIYers, Chuck and Deb knew that they had to start by doing their research. As they researched the project and materials online, they came across our website. Just like Tom and Linda, Deb and Chuck decided to order one of our sample cabinet doors. Once it arrived, they were convinced. And so, they got to measuring.
When refacing your cabinets, you will often be replacing your old front with new ones that are the exact same size. This means that it is vitally important that your measurements are both precise and accurate. This is so important because most hinges can only be adjusted around 2-3 millimeters, which means you don’t have much room for error.
Selecting a Style and Material
After doing a thorough research and taking meticulous measurements, Deb and Chuck were ready to get started. They choose Shaker cabinet doors for their cabinets and paired them with solid drawer fronts. In addition, they knew that the weather conditions weren’t going to be very ideal for finishing, so they ordered their Shaker fronts with a clear coat finish. When finishing cabinetry, it is important to do so when the temperature and humidity are agreeable. This is because wood expands and different finishing products, like paints and stains, don’t perform as well in extreme temperatures.

For the material, they chose our maple select. Our select-grade maple has the evenest coloration and most uniform grain pattern of our maple doors. This is ideal for both staining and clear finishing, because these finishes do not obscure the material beneath, but rather highlight it. This means that you want your doors to be free from things like mineral or sap deposits and knots.
Deb told me that she and Chuck both love the appearance of wood in their home. However, opting for maple specifically gave Deb a bit of pause. Typically, maple wood has a brighter hue, which would be different from the white oak that they were more used to. However, the brightness of the maple increases the brightness of the room. In fact, they told me it has also made their granite countertop appear lighter as well!
Deb and Chuck's new maple shaker fronts
Working with Jason and CabinetNow
Once they had their style, material, and sizes all chosen and recorded, they sent the spreadsheet off to Jason. Jason assisted Chuck and Deb by creating an itemized quote for their project. This quote included all the doors and drawer fronts, their sizes, their styles, and their finish.
Once they received the quote from Jason, Deb and Chuck double-checked their work. This means checking each item on the quote to ensure that all the needed parts are all present, have the proper style and finish, and, most importantly, have the correct size. After some back and forth and editing, they were ready to place their order. Since they chose a finished product, it took a little longer than our typical 10-12 for production. However, once they were off the line, they were on the truck and on their way!
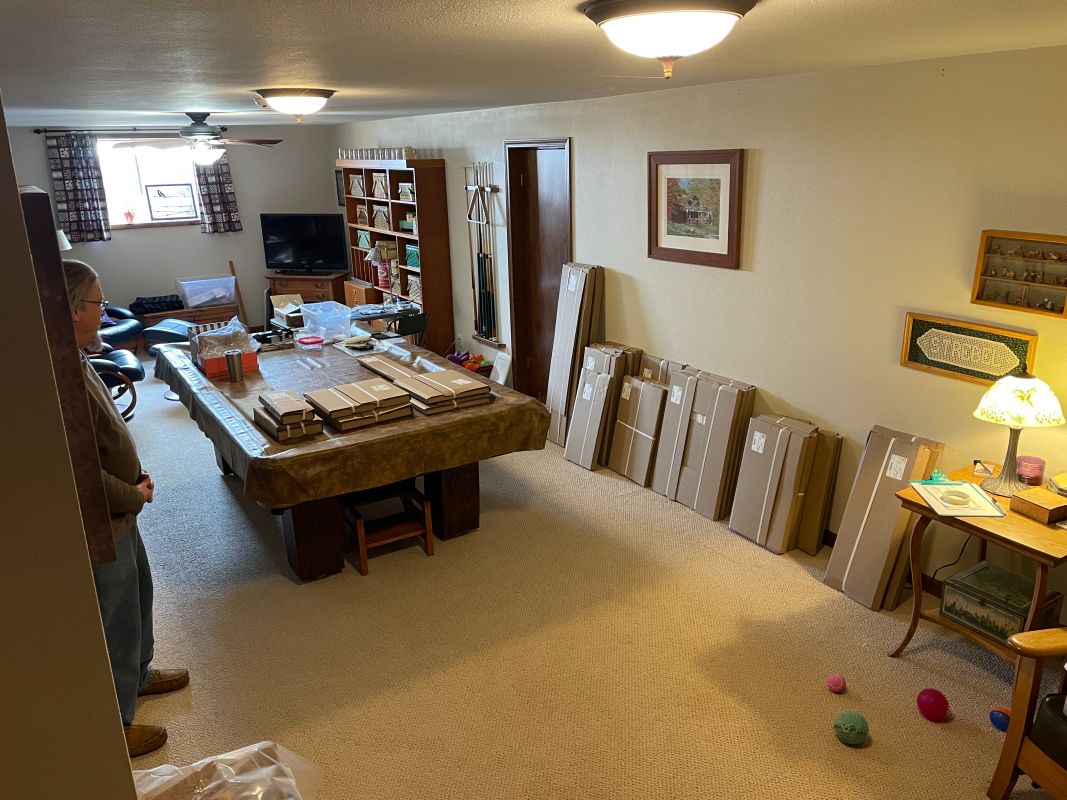
Ready to get started!
Now that the doors have arrived, Deb and Chuck got to work. Since they had done their research, they had already purchased a jig for installing the hardware. These jigs help you get the exact same placement for the hardware on each cabinet door and drawer front. However, they quickly discovered that the hardware they selected was a size that did not work with the jig.
As is so often the case, something does not go according to plan during a home improvement project. However, Chuck was able to hack together a solution with some clever problem-solving. He crafted a new jig and the work speaks for itself. Not only is the hardware installed beautifully, but it was also an excellent choice to pair with the natural finish on the cabinets. Deb and Chuck chose contemporary bronze pulls. This combination creates an interesting design that will stay in style for years to come. It combines elements of a traditional farmhouse with some updated, contemporary ones.
Back to The Boxes
Even though the doors and drawer fronts arrived finished and bored for hinges, Deb and Chuck still had to refinish their existing cabinet boxes. They order a peel-and-stick sheet of veneer to match their new maple fronts. When applying these sheets, you need to measure sections and cut the, typically, 4’ x 8’ sheet into pieces. These sheets can be a bit unwieldy, which can be it difficult to get clean, straight cuts. In another clever DIY hack, Chuck took a large piece of foam and placed it on top of his pool table. Then, he was able to place the veneer sheet on top of the foam to easily cut.
As Chuck said, “You only get one shot with these,” and so they had to take their time to ensure the best application. Once the sheet is cut up into properly sized pieces, you begin the process of applying the adhesive side to the boxes. Then, you just need to use a little bit of elbow grease to smooth the veneer out. Deb and Chuck had about three sections of cabinets that needed the new veneer covering.
A Surprise Behind the Doors
Rather than using the peel-and-stick veneer, Deb and Chuck told me that they decided to paint the cabinet box frames. Their shaker doors are hung with a full overlay, so this choice is not immediately evident when entering the space. However, when you open one of the doors or drawers, you are greeted with a refreshing, bright color.
If you look closely, you will notice that there is a corner base cabinet that doesn’t exactly match the rest. Deb and Chuck told me that they had to choose a creative route, so they replace the front with one that matched the color of their maple shaker cabinets. However, due to the configuration of the corner cabinet, it does not support the full overlay like the rest. And so, you will notice the painted frame around it, which acts as a small preview of what is behind their new cabinet doors and drawer fronts.

Frames being painted
Finishing Up the Farmhouse

Deb and Chuck were able to completely change the feel of their kitchen, without having to spend a fortune or do any major remodeling. Cabinetry refacing is an accessible project for a wide range of motivated homeowners. Deb and Chuck told me that they tackled this project together and didn’t really experience any major challenges, other than the natural stepping on toes with working with others.

One of our primary goals is to empower homeowners and show them that custom cabinetry is accessible to homeowners of many skill levels. Hopefully, reading Deb and Chuck’s story has shown you that cabinet refacing is a project that you too can complete. While they are advanced DIYers, with enough research and willpower, many homeowners can do a lot more than they may think. Plus, our highly-trained customer service and sales teams are here to support you.

The stunning results

Chuck installing the new shaker doors
If you are ready to start ordering or if you need assistance, please feel free to call us at 1-855-669-5222 or send us an email at info@cabinetnow.com. Our team of cabinet experts is here to help with everything from measuring to ordering.

