 made in the USA

Customer Success Spotlight: Tom and Linda
One of our favorite parts of working in the cabinetry industry is getting to see the stunning creations of our customers and hearing their stories. And so when Tom and Linda reached out wanting to share the results of their hard work, we jumped at the opportunity!
Originally, Tom and Linda called in to get some cabinet doors and drawer fronts for a kitchen refacing project. Refacing means removing the cabinet doors and drawer fronts, replacing them with new ones, and then painting the cabinet boxes to match. However, after working with our kitchen designer Jason, these homeowners discovered that their kitchen could be reconfigured to be more efficient and stylish. The best part? They were able to accomplish it all for under $10k! Read on to hear the story of Tom and Linda’s incredible kitchen transformation.
In the Beginning
A kitchen remodel is a big commitment, and it was not one that Tom and Linda took lightly. Before deciding to work with CabinetNow, Tom thoroughly researched his options. And so, he shopped around with around 20 other cabinet suppliers before landing with us. When it comes to home improvement projects, it is important to do your research.

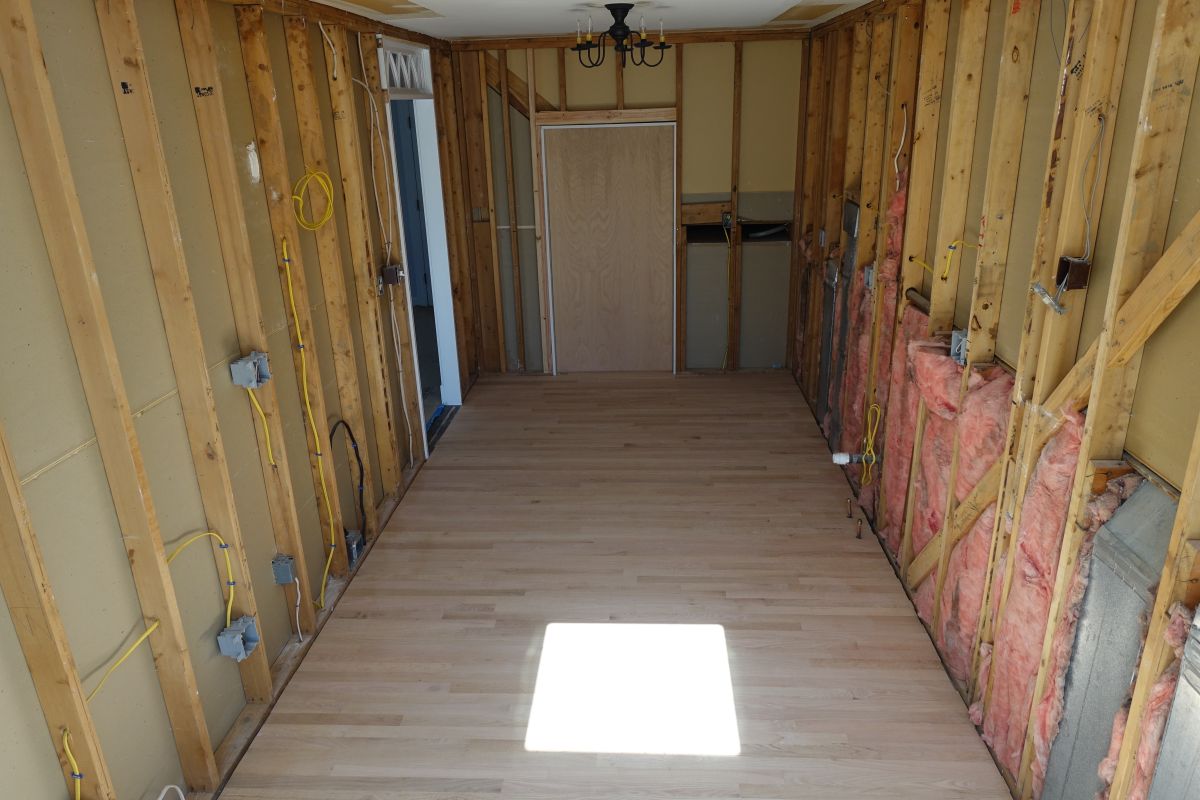
Tom and Linda's old kitchen

When speaking with Tom, he was initially struck by our customer service. After filling out our cabinetry request form, Tom was contacted quickly to greet him and get some details about his project. This was a stark contrast to his experience at the big box stores where he felt ignored. He told me that he “got faster and better attention from [CabinetNow] than [he] did from the 24 other shops [he] walked into.”And so, Tom requested a design from Jason and ordered a sample.

While it takes a bit longer than 2 days for the sample cabinet door to arrive, once it did Tom told me he was very impressed with the material quality and craftsmanship. In fact, he showed our sample cabinet door to a few other suppliers, who told him that our sample corresponded to their premium lines.
Designing a New Kitchen
Now that they were sold on the quality of our product, Tom and Linda began to work with Jason on designing their new kitchen. As stated above, Tom and Linda had only planned to reface their cabinets and preserve the original layout. However, Jason quickly noticed that there were a few opportunities to expand storage and functionality, without having to move walls.
For example, Linda wanted to add a pantry to the kitchen but she was unsure about placement. To the left of the refrigerator was a small base cabinet without doors. Jason recognized that this space could be turned into a convenient, tall pantry by removing the base cabinet and the wall cabinet above it.

Kitchen Demo
Since Linda used the kitchen frequently for cooking, she had a great understanding of the work triangle for kitchen design (also known as the magic triangle). This is a kitchen design concept that was developed in the 1940s to improve workflow in kitchens. To accomplish this, the work triangle places work surfaces near their corresponding kitchen features. For example, the tall pantry that Tom and Linda included in their design adds new storage spaces next to the refrigerator. This way, most of the items you will need for food prep are all located in the same area.
Typically, when we picture pantries we imagine shelves, and this is exactly what Tom and Linda expected. However, Jason realized there was an opportunity to make this storage solution more accessible.

Linda and Tom's new tall pantry
Deep shelves in base cabinets can provide lots of storage space. However, not many people enjoy the pain of bending over to try and find something hidden in the back. And so, while you may be able to get a lot in there, your back might not be happy about retrieving your pots or pans every day.
So, Jason suggested that Tom and Linda instead opt for pull-out drawers in their tall pantry cabinets. While this does reduce the amount of storage space available because of the hardware and drawer box, it does make the storage more accessible. Now instead of having to crawl into the back of the pantry, they can easily pull out the drawer to find what they need.

The old kitchen with large doors
In the before pictures, you can see that their cabinets had one door per cabinet box. While there is nothing wrong with wanting that style, Jason suggested opting for split doors. Tom and Linda decided to trust Jason’s suggestion.

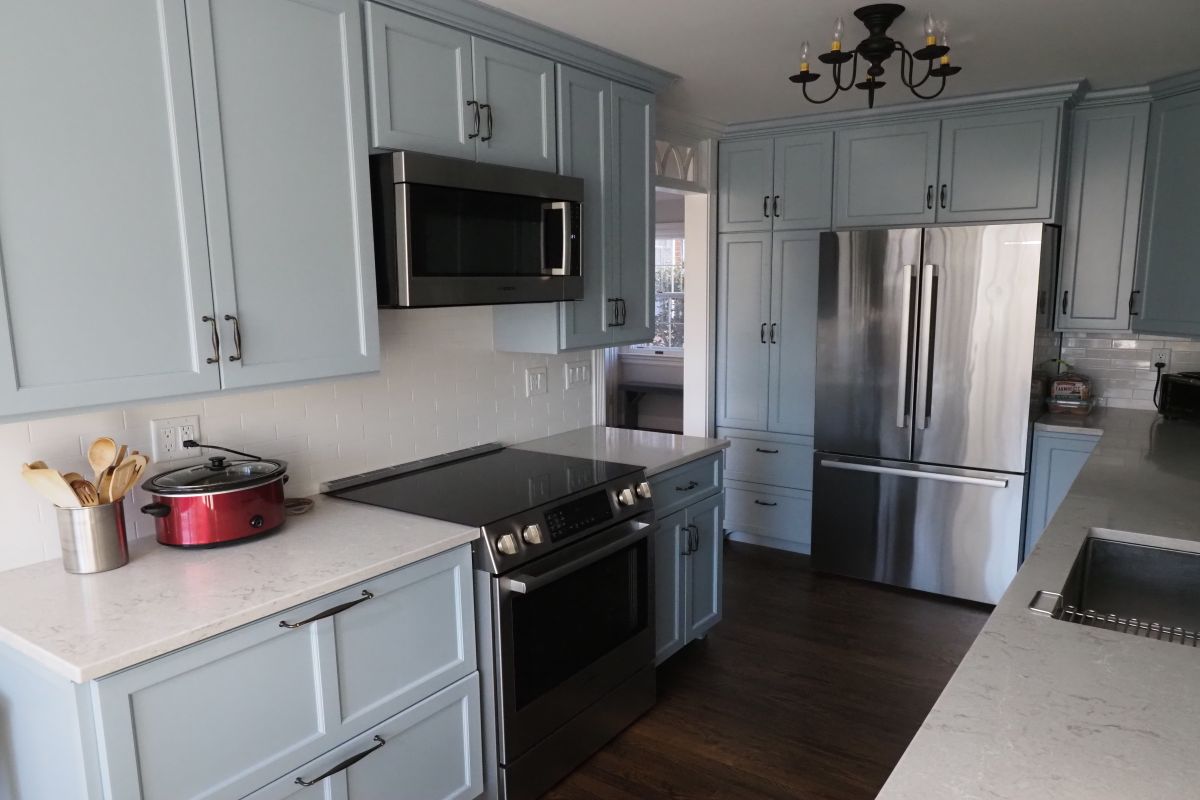
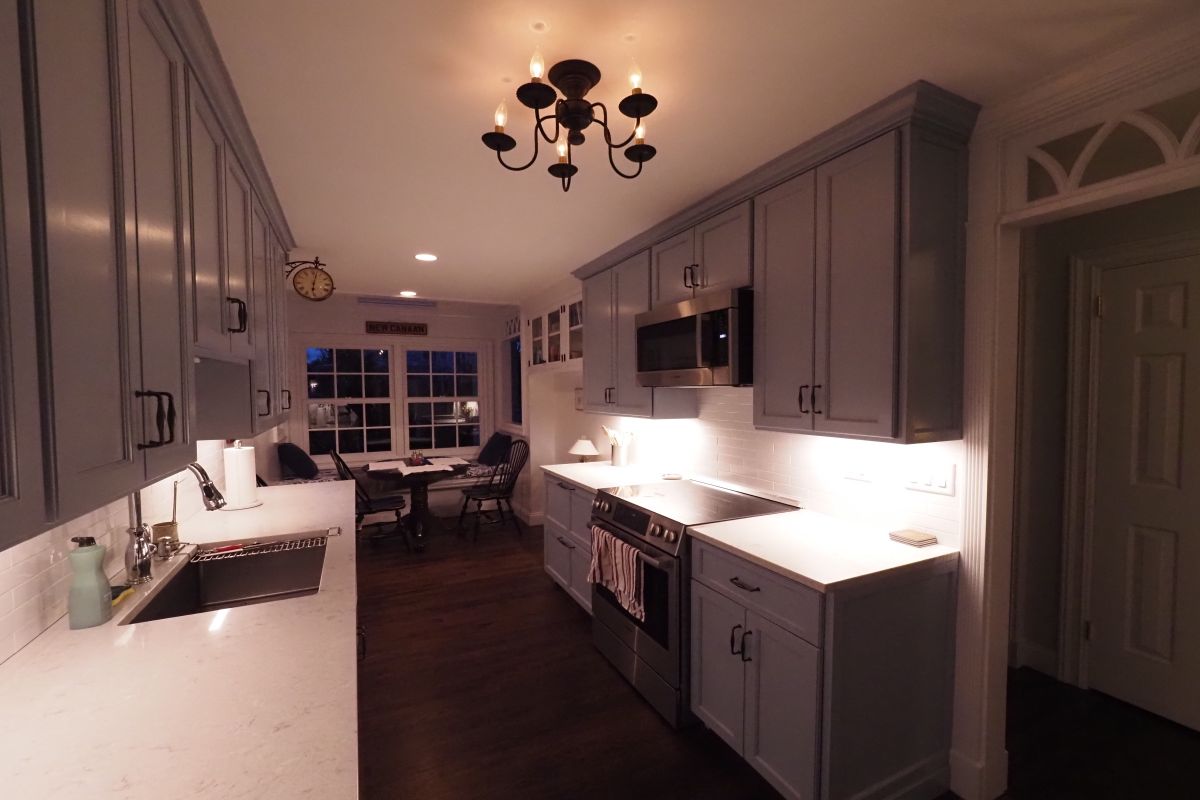
The kitchen with new, split cabinet doors
Tom and Linda have a galley-style kitchen with cabinets on both sides. And so, the smaller split doors take up less space than the large doors when open. This allows for more space for others to move through the space or to also use the kitchen. In addition to this functional benefit, the split doors also offered an aesthetic benefit.
Tom and Linda chose shaker-style cabinets for their project due to their stylish design and the fact that they are also popular with homeowners and those looking to buy. Shaker-style cabinet doors are made using a cope-and-stick construction. This means that the rails, or the horizontal pieces of the frame, fit between the stiles, or the vertical pieces of the frame. This creates a 90-degree angle where the pieces meet, which is why this style is also known as a butt joint.

With split doors, this creates a lot of lines throughout the design, which is a great way to add interest and encourage eye movement. According to Tom, all of the vertical lines in the new kitchen design actually make the space feel taller. This was another suggestion that Jason made that Tom and Linda hadn’t previously considered. Like the decision to add drawers to the tall pantry, choosing split doors turned out to be an excellent choice for their kitchen that they can continue to enjoy for years to come.
Assembling the Cabinet Boxes
All of our cabinet boxes come unfinished and are shipped ready to assemble. Tom took on the responsibility of assembling the cabinet boxes for his kitchen. He is an experienced DIYer but said he was even surprised by how easy the assembly process was. What makes the process so easy is the use of special notching that allow the panels to be securely slid into place.
As you can tell from the video, the pieces of the cabinet box can quickly be slid into place and secured with wood glue and some tacks or staples. This method gives the cabinet box a lot of strength and durability. Once he had the boxes assembled, glued, and stapled, he said that they could “be hit by a car” and still be solid. In addition to their strength, Tom also noted that “the product was superior to everything we saw in person.”
These cabinet boxes are designed to empower motivated homeowners who want to save money by assembling and installing their own cabinets. This means you don’t need a wood shop, years of carpentry experience, or a massive toolbox to get the job done and done right.
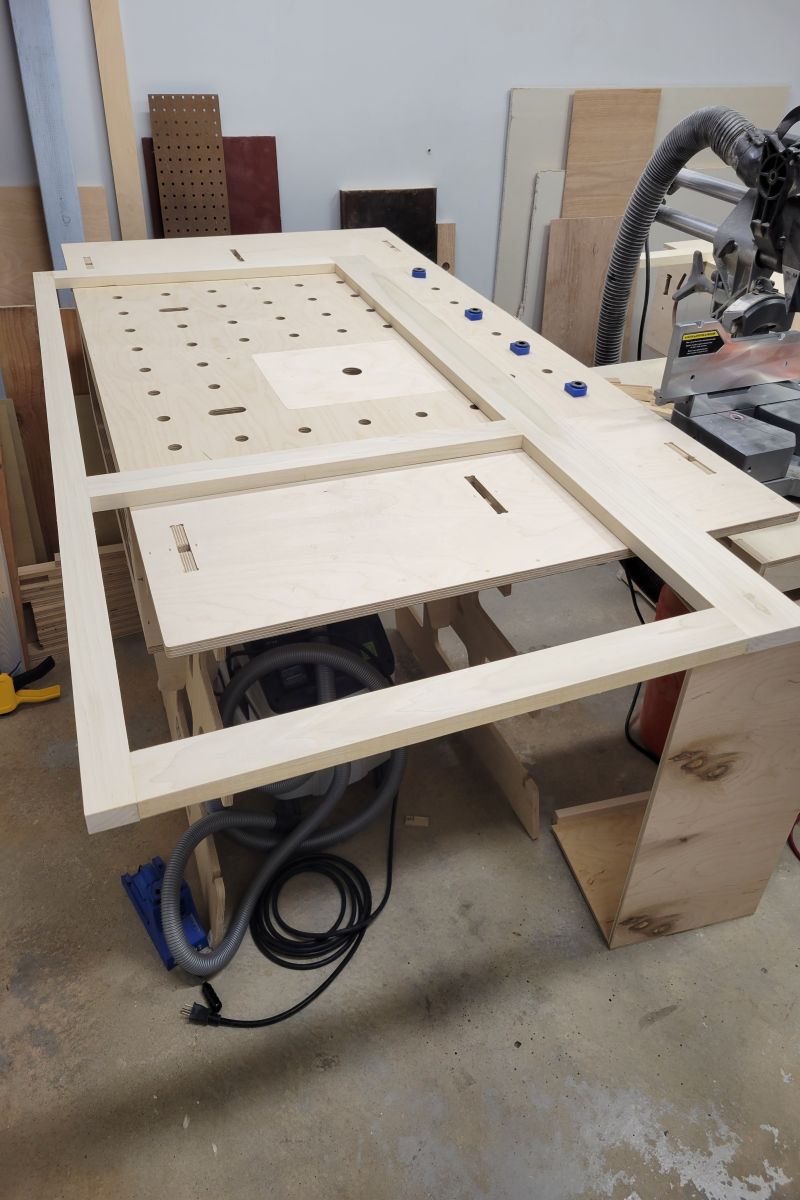
One of the solid wood face frames for the cabinet boxes
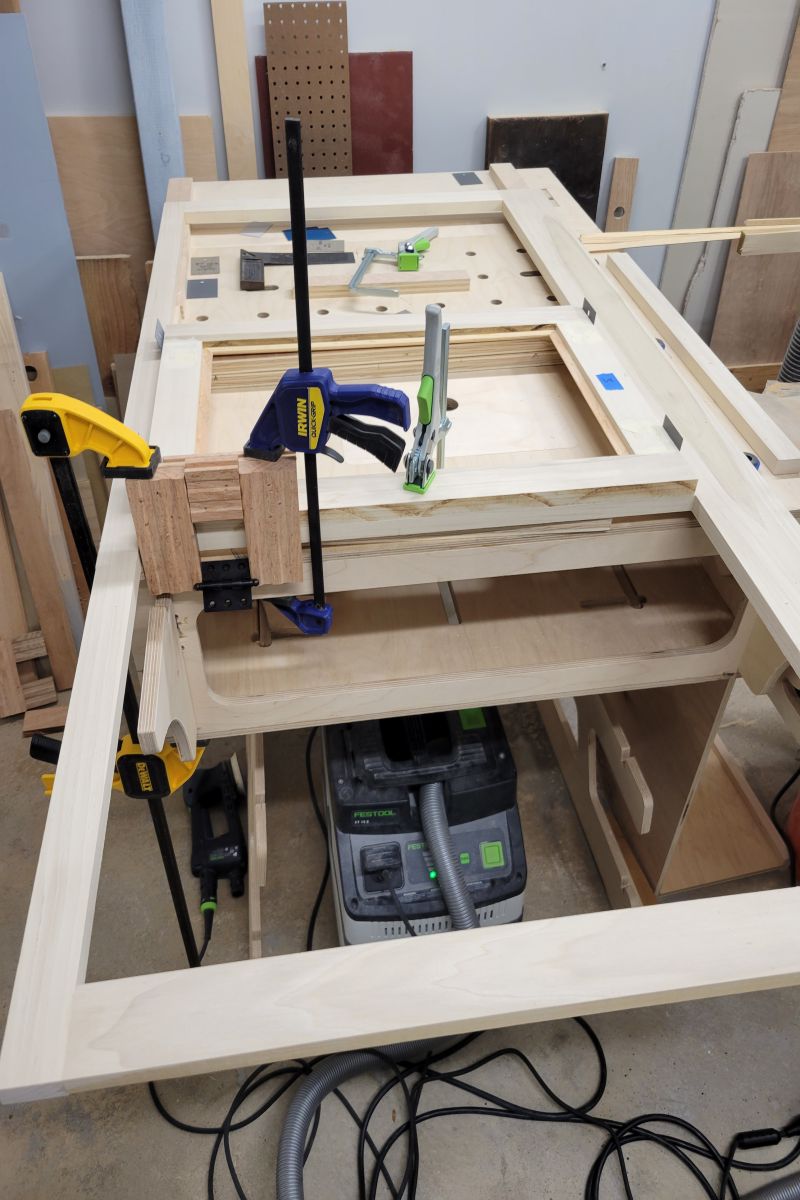
Using clamps and wood glue to assemble the boxes

All put together and ready for mounting
Painting the Cabinets
Once the boxes were assembled and in place, Tom began applying a finish to them. He chose to use paint and selected the Benjamin Moore color Santorini Blue.
Light and bright during the day
Sophisticated and subtle in low light
Tom opted to use a paint sprayer to apply the paint, which is the preferred method for this project. Before he could get started, Tom needed to set up a clean space to both spray the cabinet door and hang them to dry. He also needed to hang up plastic sheets in the kitchen, so that he could spray the cabinet boxes without getting paint on the new floor or walls.
In a genius DIYer move, Tom used some more plastic sheets, a 10 ft curtain rod, and some coat hangers and hooks and turned his garage into a paint shop.

Tom's paint studio
And so, Tom would take one door or drawer front at a time, spray down both sides, and then hang it to dry. When Linda was available, she assisted Tom in hanging the painted doors and fronts making sure that they did not bang into one another.

Tom in the studio
And just like that, Tom had all the new fronts painted and drying. Be sure to take proper safety precautions. As you can see, Tom has on his painter’s coveralls to protect his clothes, as well as goggles and a half-mask respirator. The last two items are very important, especially when painting in closed spaces like a garage. This is because paints can release fumes that can be toxic after prolonged exposure.
To read more about painting cabinets, check out our cabinetry finishing guide!
Always Look to Up-cycle
Speaking of Tom’s garage, it recently got an upgrade too. Since the cabinet boxes that they removed were still in good condition, Tom decided to install them in the garage. When doing a kitchen remodel, you will likely be removing a lot from your kitchen. Keep an eye out for ways you, or maybe someone else in your community could use anything you are taking out that is still in usable condition. Plus, this helps cut down on the amount of stuff you will throw away at the dump.
Putting it All Together
Now that all the boxes, cabinet doors, and drawer fronts are finished, it is time to install them. Tom told me that he had never used compact and concealed hinges, also referred to as European style, that attach to the back of the doors and are hidden inside the cabinets. After installing, Tom said that he loves the new look of the cabinets now that he can no longer see the hinges.

In addition, Tom installed another wall cabinet box to make space for Linda to keep her cookbooks. They opted for glass cabinet doors instead of opening shelving so that the books are protected from any dust. He also used white paint for this piece, which creates a great transition between the kitchen and the connected sunroom.

Beautiful Transition
Finishing Up
As you can see, you don’t have to fire a team of professionals to achieve great results. Tom and Linda did, however, hire pros to take care of the electrical work and the plumbing, because their new layout required outlets to be moved and some new plumbing work. These specializations are often not as homeowner friendly and trying to do these types of jobs without the proper training can be dangerous.
After working with our designers and customer service reps, Tom could tell that we are “consumer-centric” and excited to help you achieve the kitchen or bathroom, or any space you need cabinets, of your dreams. Since wrapping up the kitchen process, Tom has decided to remodel their basement. He already told me he is excited to work with us again, and he told me that they “are going to do the room because of CabinetNow.”

If you want to find out for yourself what Tom is raving about, give us a call! We will do our best to meet your needs and support you through the process!

If you are ready to start ordering or if you need assistance, please feel free to call us at 1-855-669-5222 or send us an email at info@cabinetnow.com. Our team of cabinet experts is here to help with everything from measuring to ordering.

